Introduction
Amazon shoppers make split-second decisions; some studies suggest it takes less time than choosing a Netflix show. That’s why knowing How To Create An Attractive Amazon Storefront isn’t just a design skill; it’s a sales advantage.
This guide breaks down how smart structure, visual psychology, and data-driven optimization quietly influence clicks, trust, and buying behavior, often without shoppers realizing it.
Building Your Brand Presence: The Complete Amazon Storefront Setup Guide
Creating an attractive Amazon Storefront isn't just about making things look pretty. It's about building a branded shopping experience that converts browsers into buyers and establishes your presence on the world's largest marketplace.
Whether you build it in-house or with professional Amazon marketing services, the fundamentals stay the same.
Let's walk through exactly how to create a Storefront that stands out.
Prerequisites for Creating an Amazon Storefront
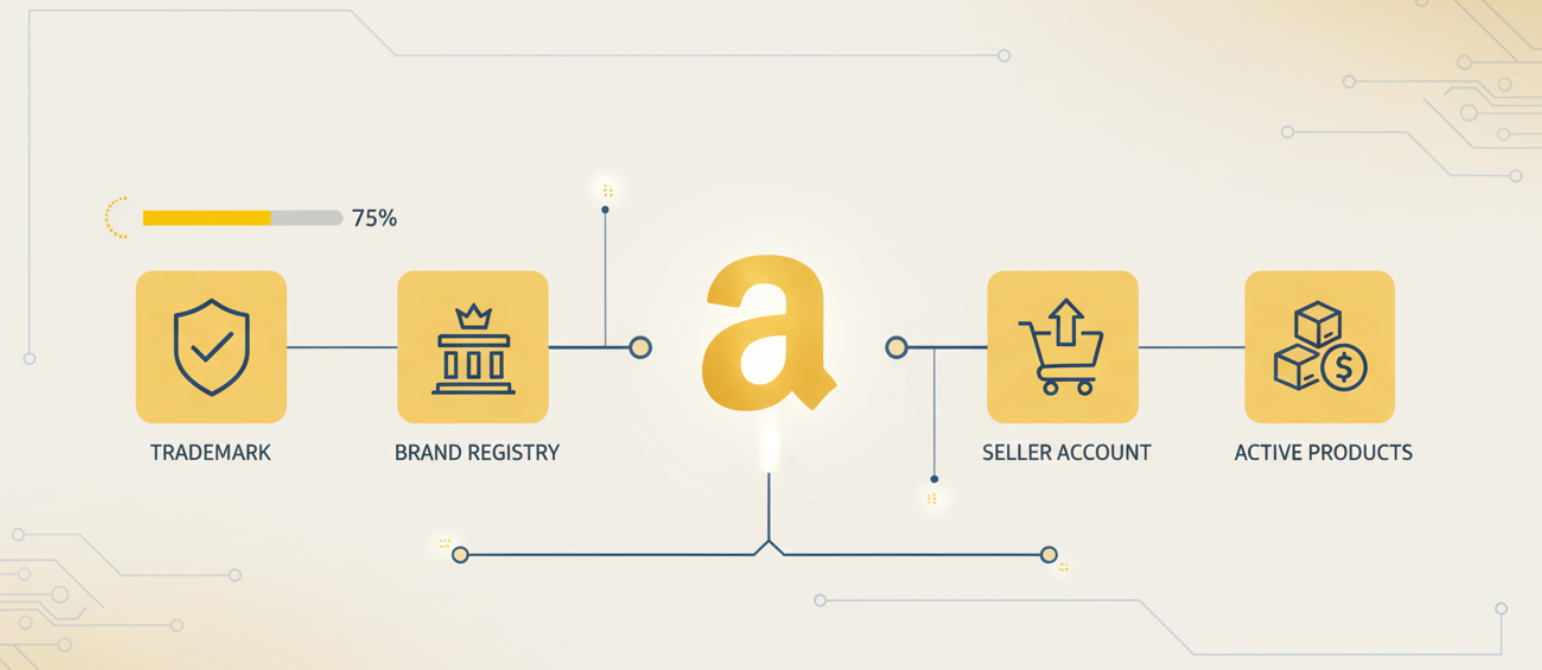
Before you can start building your Storefront, you need two essential requirements in place. Amazon Brand Registry enrollment is mandatory, which means you must have an active registered trademark for your brand. Without it, you won't have access to the Stores builder at all.
Additionally, you need an active Amazon Seller or Vendor account. If you're selling through Amazon already, you're halfway there.
- Registered trademark (pending applications don't qualify)
- Brand Registry approval (typically takes 1 to 2 weeks after trademark verification)
- Active Seller Central or Vendor Central account
- Products actively listed under your registered brand
Pro tip: Start your trademark application early if you haven't already. The trademark process can take 6 to 12 months, and Amazon won't grant Brand Registry access without it. Consider using a trademark attorney to expedite the process and avoid rejections.
Step 1: Access Amazon Stores Builder
Navigate to your Seller Central dashboard and find "Stores" under the Advertising menu. Click "Create Store" to launch the builder interface. The first time you access it, Amazon will ask you to verify your brand information and agree to its content policies.
The Stores builder interface is drag-and-drop friendly, which makes it accessible even if you don't have design experience.
- Log in to Seller Central
- Navigate to Advertising > Stores
- Click "Create Store" or "Manage Stores"
- Verify your brand name and logo
Once you're inside the builder, you'll see a preview pane on the left and editing tools on the right. Think of this as your blank canvas. Everything you build here will become your dedicated brand destination on Amazon.
Step 2: Choose Your Storefront Template

Amazon offers both blank canvas options and pre-designed templates tailored to different industries and brand styles. Your choice here depends on your catalog size, design comfort level, and how quickly you need to launch.
Blank templates give you complete creative control but require more time to build from scratch. Pre-designed templates offer structure and save time, especially if you're managing a large product catalog.
- Evaluate template categories (e.g., fashion, electronics, home goods)
- Preview how each template displays on mobile vs. desktop
- Consider your product count and category structure
- Choose based on your brand aesthetic and customer journey
Example: If you're selling premium skincare with 15 to 20 products, a minimalist template with clean lines and plenty of white space works better than a grid-heavy layout designed for large catalogs. The template should enhance your brand story, not overshadow it.
Step 3: Design Your Homepage Layout
Your homepage is the first impression customers get when they land on your Storefront. Start by selecting your tile configuration; Amazon offers options from single full-width heroes to multi-tile grids. The key is balancing visual impact with easy navigation.
Focus on featuring your bestsellers and new arrivals above the fold, with clear visual hierarchy guiding visitors deeper into your Storefront.
- Select tile layouts (full width, split, grid, or multi tile)
- Choose appropriate widgets (product grid, shoppable images, video)
- Plan your content hierarchy (hero section → featured products → categories)
- Balance imagery with product showcases
Pro tip: The three tile layout performs exceptionally well for brands with distinct product categories. Put your hero brand message in the top full-width tile, then split the next row into three clickable category tiles that direct customers to specific collection pages.
Step 4: Add Compelling Brand Assets
This is where your brand comes to life. Upload your logo with a transparent background (PNG format) to the designated logo spot. Your hero image should be high resolution (at least 1500 x 600 pixels) and communicate your brand's unique value proposition.
The brand story section lets you tell customers why you exist beyond just selling products. This builds emotional connection and trust.
- Logo placement (top left, typically 400 x 400 pixels minimum)
- Hero image (3000 x 1200 pixels for best quality)
- Brand story copy (2 to 3 paragraphs maximum)
- Supporting lifestyle images that show products in use
Example: Instead of just showing product shots, YETI uses lifestyle imagery of their coolers in outdoor adventures like camping, fishing, and tailgating. This connects their products to aspirational experiences, not just functional benefits.
Step 5: Organize Product Categories

Logical category organization makes or breaks the browsing experience. Think about how your customers actually search for products. Create subcategory pages that group related items together, making it effortless for shoppers to find exactly what they need.
Your navigation menu should be intuitive, with clear labels that match how customers think about your products.
- Create subcategory pages for major product groupings
- Develop logical navigation structure (3 click rule: home → category → product)
- Label categories with customer-friendly language
- Plan for future product additions
If you sell athletic apparel, don't just create "Men's" and "Women's" categories. Break it down further: "Running Gear," "Training Essentials," "Yoga & Recovery." This helps customers navigate by their specific activity or need rather than generic demographic categories.
Step 6: Optimize Product Showcase Tiles
Each product tile is a mini advertisement for that specific item. Use high-resolution images with clean backgrounds and consistent lighting. Add text overlays sparingly; they should enhance, not obscure, your product images.
Your call to action should be clear and action-oriented: "Shop Now," "Explore Collection," "New Arrivals."
- Minimum 1000 x 1000 pixel product images
- Consistent image style across all tiles
- Strategic text overlays (25 to 40 characters max)
- Action-oriented CTAs that drive clicks
Pro tip: A/B test your product tiles if possible. Sometimes a lifestyle shot outperforms a white background product image, and sometimes it's the reverse. It depends on your category and customer base.
Step 7: Configure Meta Information
Your Storefront URL is your brand's permanent address on Amazon. Choose wisely; you can only set it once. Keep it simple, memorable, and matching your brand name as closely as possible (amazon.com/yourbrandname).
Metadata helps Amazon understand what your Storefront is about for search indexing.
- Custom Storefront URL (amazon.com/[yourbrand])
- Meta title (include brand name and primary category)
- Meta description (150 to 160 characters, benefit-focused)
- Storefront tags for improved discoverability
Example: If you're "Coastal Coffee Roasters," claim amazon.com/coastalcoffee rather than amazon.com/coastalcoffeeroasters-officialstore. Shorter is better for shareability.
Step 8: Preview Across Devices
Over 60% of Amazon traffic comes from mobile devices, yet many brands only optimize for desktop. Use the device preview toggle in the Stores builder to see exactly how your Storefront appears on smartphones and tablets.
What looks perfectly spaced on a desktop might be cramped and unreadable on mobile.
- Toggle between desktop, tablet, and mobile views
- Check text readability at smaller sizes
- Verify image cropping on different screen ratios
- Test navigation functionality on touch devices
Pay special attention to your text overlays and CTAs; they need to be readable on a 5-inch screen without zooming. If customers have to squint or pinch zoom to read your messaging, you've already lost them.
Step 9: Submit for Review
Amazon reviews every Storefront before it goes live to ensure compliance with its content policies and quality standards. This typically takes 24 to 72 hours, though it can be longer during peak seasons. Common rejection reasons include poor image quality, prohibited claims, or competitor brand mentions.
Review Amazon's content policy one more time before submitting to avoid delays.
- Final content review (spelling, image quality, link functionality)
- Policy compliance check (no competitor logos, medical claims, etc.)
- Submit through the Stores builder
- Monitor your email for approval or revision requests
Common rejection triggers: Mentioning competitor brand names, making unsubstantiated health claims, using low-resolution images, or including external website links. Clean these up before submission to avoid the back and forth.
Step 10: Publish and Promote
Once approved, your Storefront goes live immediately. But launching is just the beginning; now you need to drive traffic to it. Share your Storefront URL in email campaigns, social media bios, and even on your product packaging via QR codes.
Start running Sponsored Brands campaigns with Store Spotlight to funnel ad traffic directly to your Storefront.
- Share Storefront URL across all marketing channels
- Create Sponsored Brands campaigns linking to your Storefront
- Add Storefront link to product packaging
- Monitor Store Insights to track visitor behavior
Launch checklist: Update your social media bios with your Storefront URL, send an email blast to your customer list announcing your new Amazon shop, and create Instagram Stories with a link sticker directing followers to your Storefront. The more visibility you create in the first week, the better your initial traffic metrics.
Your Amazon Storefront is your brand's home on the platform; build it strategically to convert visitors into loyal customers.
Measuring Success: Track and Optimize Your Amazon Storefront Performance
Building your Storefront is only half the battle; understanding how it performs is what separates successful sellers from those stuck wondering why sales aren't climbing. Amazon Store Insights gives you the data you need to measure effectiveness, identify opportunities, and prove that your beautiful Storefront is actually driving revenue, not just looking pretty.
The good news? Amazon provides robust analytics specifically designed for Storefronts. The better news? You don't need a data science degree to understand and act on these metrics.
Let's break down exactly what to track and how to interpret the numbers that matter.
Accessing Your Store Insights Dashboard
Navigate to Seller Central > Stores > Manage Stores, then click on your Store name and select "View Store Insights." This dashboard updates daily with performance data, though you'll want to analyze trends over at least 14 to 30 days for meaningful patterns rather than reacting to daily fluctuations.
- Log in to Seller Central
- Go to Stores > Manage Stores
- Click your Storefront name
- Select "View Store Insights" from the menu
- Set your date range (minimum 14 days recommended)
The dashboard displays data with a slight delay, typically refreshing overnight. Don't panic if yesterday's traffic doesn't appear immediately; Amazon processes Store Insights on a rolling basis.
Key Metrics That Actually Matter

Your Store Insights dashboard tracks dozens of data points, but these five metrics tell you everything you need to know about performance.
Visitors: Total unique customers who landed on your Storefront during the selected timeframe. This metric tells you if your traffic generation efforts (ads, social media, packaging inserts) are working. A steady upward trend indicates growing brand awareness.
Page Views: How many total pages within your Storefront were viewed? Higher page views relative to visitors means people are exploring multiple pages, which signals strong engagement and a good navigation structure.
Sales Attributed to Store: Revenue generated from customers who visited your Storefront within their purchase journey. This is your ROI metric, the number that proves your Storefront investment is paying off. Amazon attributes sales even if the purchase happened on a product listing page, as long as the customer visited your Store first.
Traffic Sources: Where your visitors originated from, broken down into three categories. Organic traffic comes from Amazon search and product detail pages; paid traffic arrives via Sponsored Brands campaigns; external traffic flows from social media, email, or off-Amazon marketing. Understanding this mix helps you allocate marketing budget effectively.
Daily Visitors and Views: Trend lines showing traffic patterns over time. Look for spikes that correlate with promotions or external campaigns, and identify slow days where an additional marketing push might help.
What Good Performance Looks Like
Benchmarks vary by category and catalog size, but here's what healthy Storefront metrics generally show:
Engagement rate: Page views should be 2x to 3x your visitor count. If someone visits and only views one page before leaving, your navigation or content isn't compelling enough.
Attribution rate: At least 15% to 25% of your total Amazon sales should be attributed to Store visits. Lower percentages suggest your Storefront isn't integrated well into your overall marketing funnel.
Traffic diversity: A balanced mix of traffic sources reduces risk. Aim for no single source representing more than 60% of total traffic. Over-reliance on paid ads means you're essentially renting customers rather than building organic brand equity.
Pro tip: Export your Store Insights data monthly and track it in a spreadsheet. Month-over-month growth in visitors and attributed sales indicates you're building momentum. If these numbers plateau or decline, it's time to refresh your Storefront content, adjust your promotional strategy, or revisit your product mix.
Long-Term Sales Growth Starts With Storefront Fundamentals
An attractive Amazon Storefront isn’t a cosmetic upgrade; it’s a profit lever. When design, structure, product flow, mobile experience, and performance tracking are aligned, your Storefront becomes a system that compounds results over time. The brands that scale past plateaus treat Storefronts as revenue infrastructure, not static pages.
For Amazon sellers and Shopify brands already doing strong monthly revenue, Olifant Digital helps turn Storefronts into high-performing growth assets that increase both sales and profit. Let’s take what you’ve built, refine it strategically, and scale it into a Storefront that works as hard as your business does.