Introduction
Selling on Amazon is about conversion efficiency. You do not need more traffic if you are wasting the clicks you already get.
A+ Content is the final persuasion tool that turns a skeptical browser into a paying customer by answering questions and building brand trust in real-time.
This guide details the tactical process for building A+ Content that actually moves the needle. We are focusing on data-driven clarity and buyer psychology (not just making things look pretty).
How to Create A+ Content on Amazon to Boost Sales: Build Listings That Convert Traffic Into Revenue
Selling on Amazon is about conversion efficiency. You do not need more traffic if you are wasting the clicks you already get.
A+ Content is the final persuasion tool that turns a skeptical browser into a paying customer by answering questions and building brand trust in real-time.
This guide details the tactical process for building A+ Content that actually moves the needle. We are focusing on data-driven clarity and buyer psychology (not just making things look pretty).
Amazon A+ Content Creation: Step-by-Step Process to Increase Conversions
A+ Content is not a decorative luxury. It is a strategic necessity that can increase your conversion rate by 3% to 10%. Effective modules reduce your return rate because they educate the buyer on exactly what they are getting.
Follow this sequence to build a conversion-first listing.
Step 1: Access A+ Content Manager and Verify Eligibility
You need Brand Registry. This is a non-negotiable entry requirement. Without it, you are stuck with the standard text description that no one reads.
- Navigate to Seller Central → Brands → Brand Registry to confirm enrollment
- Ensure your registered trademark matches the brand on your product listings
- Go to Advertising → A+ Content Manager and click "Start creating A+ content"
- Select "Build your own" for maximum customization control
The approval process for Brand Registry can take 14 days. Do not wait for approval to start your creative work. Prepare your assets now so you can go live the moment you are cleared.
Step 2: Research and Plan Your Content Strategy

Do not start with a blank canvas. Start with your customers' complaints. You are using this space to kill objections before they happen.
Research your audience and competitors:
- Read 3-star and below reviews to identify pain points and common complaints
- Review your Customer Q&A section for recurring questions about features or compatibility
- Study the top 5-10 competitor listings to see their A+ Content layouts and identify gaps
- Note which features customers praise in 5-star reviews
Map your strategic content flow (5 modules):
- Module 1: Hero image with primary benefit (80% of visitors only see first 2 modules)
- Module 2: Key features with supporting images
- Module 3: Problem-solution storytelling
- Module 4: Social proof, certifications, or brand story
- Module 5: Comparison table or usage scenarios
Your module selection should directly address the top 3 objections from negative reviews. If customers complain about sizing, dedicate Module 2 to detailed measurements with comparison images.
Step 3: Create High-Quality Visual Assets
Amazon shoppers make purchase decisions in seconds, which means your images need to communicate value instantly. Poor image quality is the #2 reason for A+ Content rejection.
Technical image specifications:
- Minimum resolution: 970 x 600 pixels (some modules require 1200 x 1200px)
- Maximum file size: 5MB per image
- Accepted formats: JPG or PNG only
- Recommended DPI: 300 for crisp quality
Image types you need (5-15 total):
- Hero image (1200 x 600px): Product in ideal use scenario with benefit overlay
- Feature images (300 x 300px): Close-ups demonstrating specific features
- Lifestyle images (970 x 600px): Real people using your product
- Comparison graphics: Before/after, size comparisons, process diagrams
Design best practices:
- Use consistent brand colors (3-4 maximum)
- Maintain high contrast for mobile readability
- Keep text overlays minimal (5-10 words max)
- Show your product as the hero
- Use professional lighting and sharp focus
Lifestyle images with people convert 30-50% better than plain product shots. Use Canva for beginner-friendly templates, Adobe Photoshop for professional editing, or Remove.bg for background removal.
Step 4: Write Compelling, Policy-Compliant Copy
Amazon's content policies are strict, and 30-40% of first submissions get rejected for violating them. Understanding what you can and cannot say saves days of resubmission delays.
Amazon strictly prohibits:
- Pricing information ("$19.99", "50% off")
- Time-sensitive claims ("limited time", "today only")
- Promotional language ("buy now", "click here")
- Competitor brand names (can't say "better than Brand X")
- Contact information or warranty specifics
The Conversion Formula: [Feature] + [How it works] + [Benefit to Customer].
Example: "Double-Insulated Steel (Feature) keeps coffee hot for 12 hours (How it works) so you can enjoy a fresh cup during your entire commute (Benefit)."
Step 5: Build Your A+ Content in Seller Central
When you have your assets ready, assembly is straightforward.
- Name it clearly: Use a naming convention like "Product-A+-V1-2026."
- Add Modules: Use the dropdown to select your five modules. Put your most important information in the top two modules. Most shoppers never scroll to the bottom.
- Alt-Text: Fill out the image keywords. This helps with accessibility and provides a small SEO signal for off-site search engines.
- Apply ASINs: Apply the content to the parent ASIN. This ensures every variation (size, color) inherits the content.
Check the mobile preview. Most of your traffic is on a phone. If your text is too small in the graphic, the shopper will bounce.
Step 6: Monitor Performance and Optimize for Sales

Creating A+ Content isn't a one-time task; it's an ongoing optimization process driven by data. The most successful sellers continuously refine based on customer behavior and conversion metrics.
Wait 14 days for meaningful data:
- A+ Content needs at least 2 weeks for traffic patterns to stabilize
- Early fluctuations are normal as Amazon's algorithm adjusts
- Don't make changes during this period
Access performance metrics:
- Navigate to Brands → Brand Analytics → A+ Content
- Compare 30 days before vs 30 days after launch
- Track: conversion rate, sessions, units ordered, revenue
Critical KPIs to monitor:
- Conversion Rate: Target +3-10% improvement
- Unit Session Percentage: Sales per visitor
- Detail Page Views: Should remain stable or increase
- Return Rate: Should decrease with better education
Take action based on results:
Conversion increased 3-10%+: Success, continue monthly monitoring, apply to other products, make minor refinements.
Conversion increased 0-3%: Test different module combinations, strengthen benefit-focused copy, survey customers about decision factors.
Conversion flat or decreased: Major revision needed; review competitor content, check for promise-reality misalignment, consider complete redesign.
Critical insight: When conversion rates improve but return rates also increase, your images or copy are setting incorrect expectations. The solution is always to add more specificity to Module 2, such as showing actual product dimensions next to common household objects or including detailed specification charts that leave no room for misinterpretation.
Step 7: A/B Test and Continuously Improve
The highest-performing sellers don't guess what works; they test systematically and let data guide decisions. A/B testing reveals which specific elements drive conversions, allowing you to scale winning strategies.
Create strategic variations:
- Duplicate your content in A+ Content Manager
- Change 1-2 modules only (isolate variables)
- Common tests: hero image style, feature ordering, comparison table presence
Run proper A/B tests:
- Apply Version 1 to 50% of similar ASINs
- Apply Version 2 to the remaining 50%
- Run test for 4-6 weeks minimum
- Compare conversion rates using Brand Analytics
- Apply the winning version to 100% of ASINs
Update frequency:
- Quarterly review: Check metrics every 3 months
- Bi-annual refresh: Update images/copy twice yearly
- Immediate updates: When consistent negative feedback appears
- Seasonal updates: Refresh for holiday relevance
Don't change multiple variables at once; you won't know which caused the improvement.
Step 8: Scale A+ Content Across Your Catalog
Once you've validated your A+ Content approach with top products, it's time to systematically roll it out across your catalog. Strategic prioritization and efficiency systems make this manageable.
Prioritize products strategically:
- High priority: Best-sellers (top 20% of revenue), high-traffic/low-conversion products, new launches, competitive items
- Medium priority: Moderate sellers with growth potential, seasonal products, high return rate items
- Low priority: Low-traffic products, phasing-out inventory, commoditized items
Build efficiency systems:
- Develop a brand style guide (colors, fonts, image styles, tone)
- Create reusable modules (logo, brand story, certifications)
- Batch similar products together (all supplements, all electronics)
- Use templates to reduce time from 8-12 hours to 3-5 hours
Pro tips for maximum impact:
- Lead with the strongest benefit in Module 1 (80% see only the first 2 modules)
- Use lifestyle images over plain shots (30-50% better conversion)
- Address the top 3 objections from reviews
- Coordinate messaging between A+ Content and bullet points
- Include a comparison table (high-converting module)
- Optimize for mobile (70%+ of traffic)
- Use social proof (certifications, years in business, customer counts)
For brands with 20+ products, consider working with an Amazon account management agency to handle design, copywriting, and optimization at scale.
Real A+ Content Examples Built by Olifant Digital
Every framework above only matters if it translates into results on an actual Amazon listing. Below are two A+ Content builds Olifant Digital delivered for real brands - one in competitive fitness equipment, one in premium accessories. Both started with the same process: research first, modules built before ads went live, and conversion data used to refine.
These aren't templates. Each module sequence was built around the specific buyer objections and purchase motivators we found in review research and Q&A analysis for that brand and category.
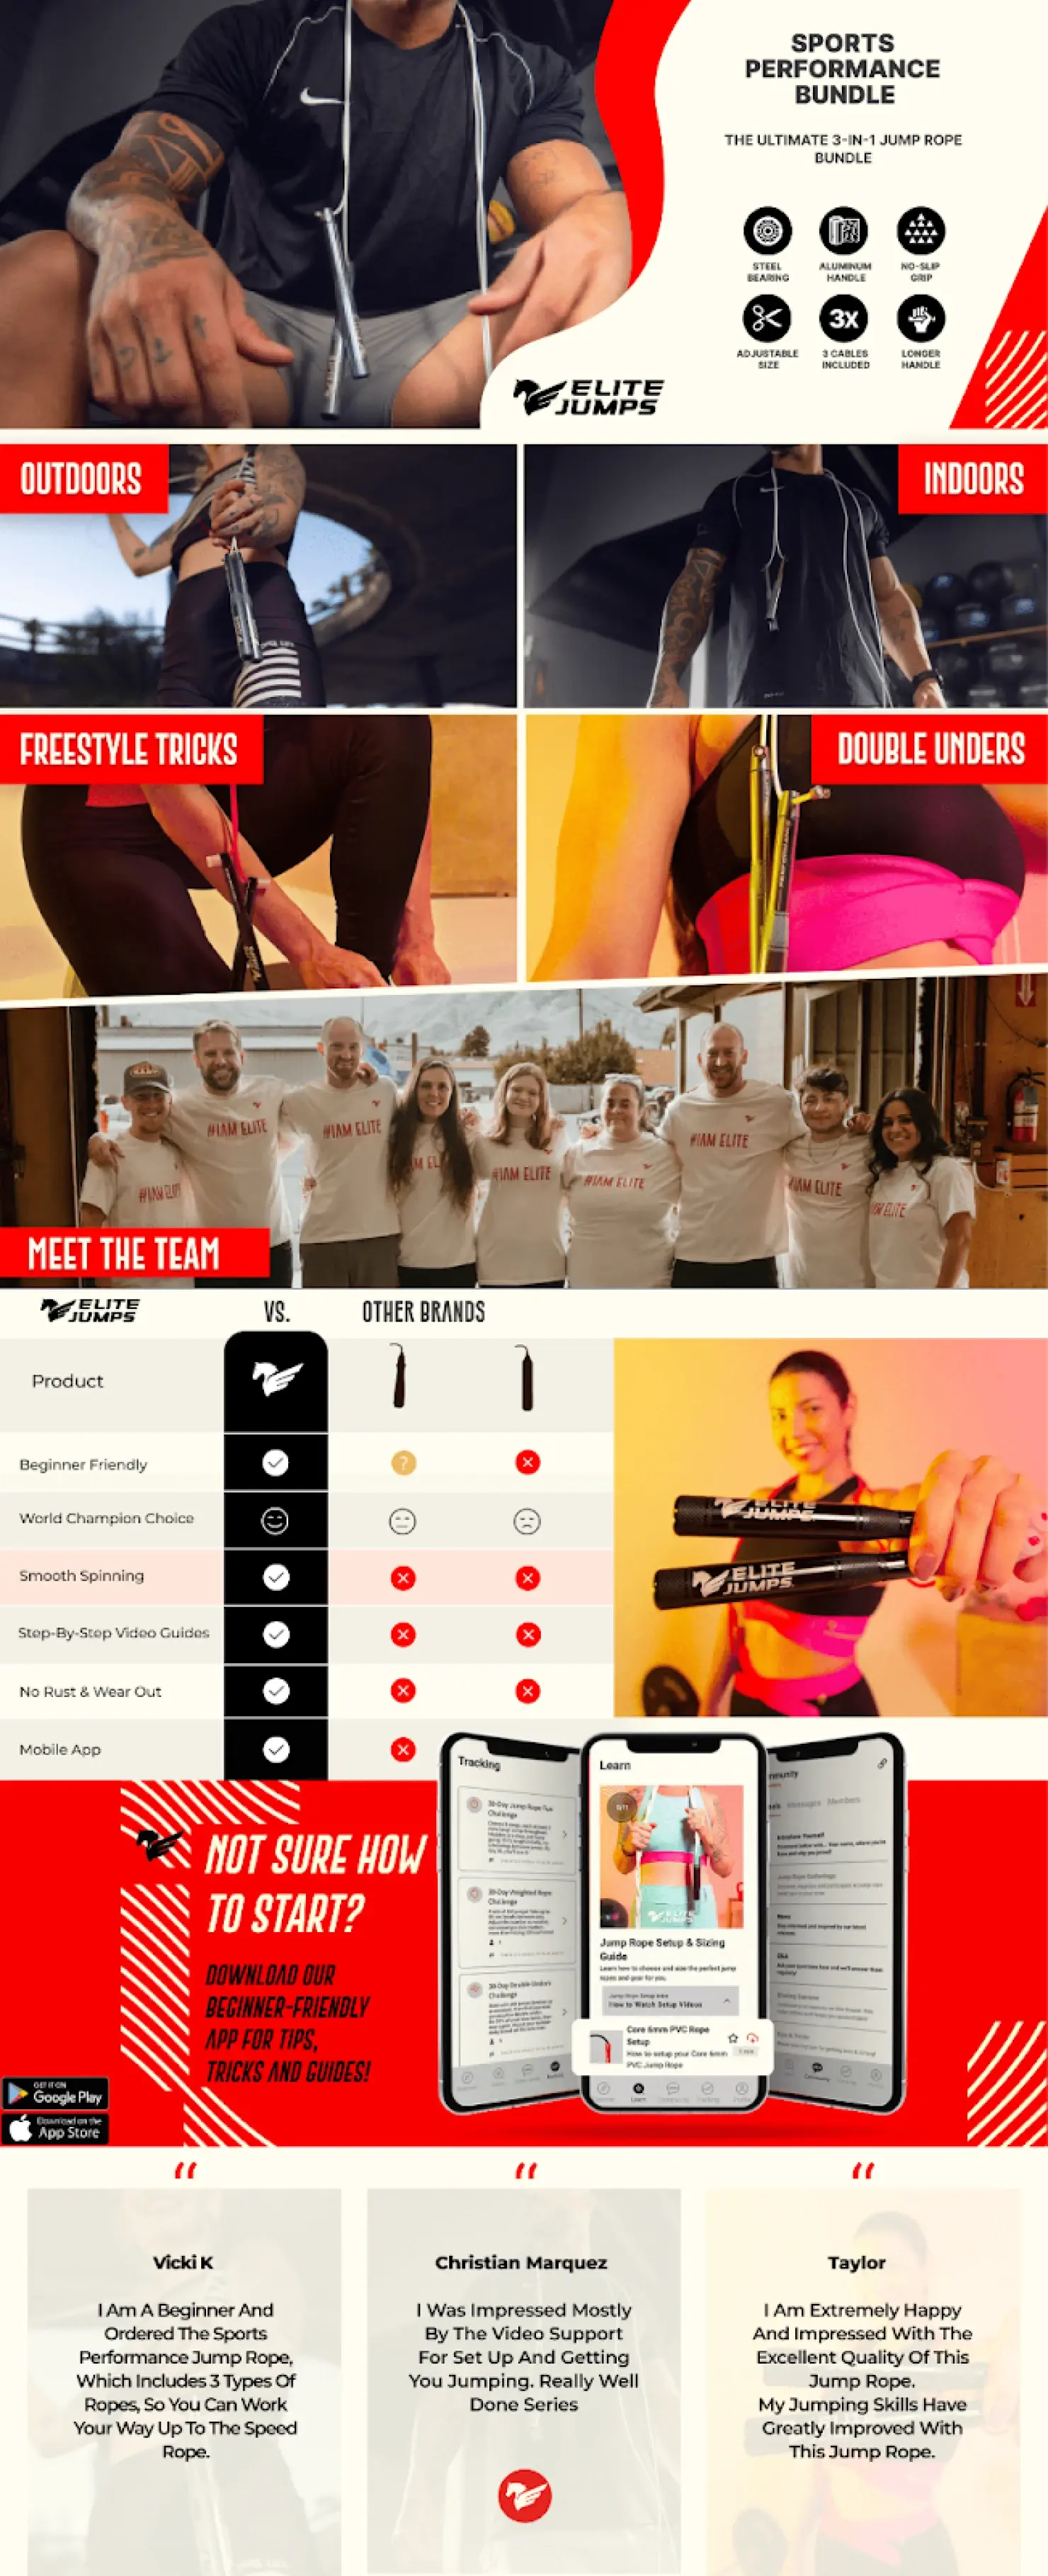
Elite Jumps — Performance Fitness
Elite Jumps had cycled through multiple agencies and freelancers. PPC was burning budget, organic visibility was flat, and competitors with weaker products were winning on listing quality alone. The A+ Content they had was template-level — no objection handling, no mobile consideration, no conversion logic.
We started with review and Q&A mining across Elite Jumps and the top 10 competing listings. Three objections kept appearing: "Will this handle double-unders at speed?", "How do I size it correctly?", and "Is it actually durable enough for daily training?" We built every module to answer one of those questions before the shopper had to ask it.
The result was a 51% lift in conversion rate, achieved through the listing rebuild — not by increasing ad spend. That CVR improvement compounded with daily PPC optimization to deliver 124% revenue growth in 90 days.
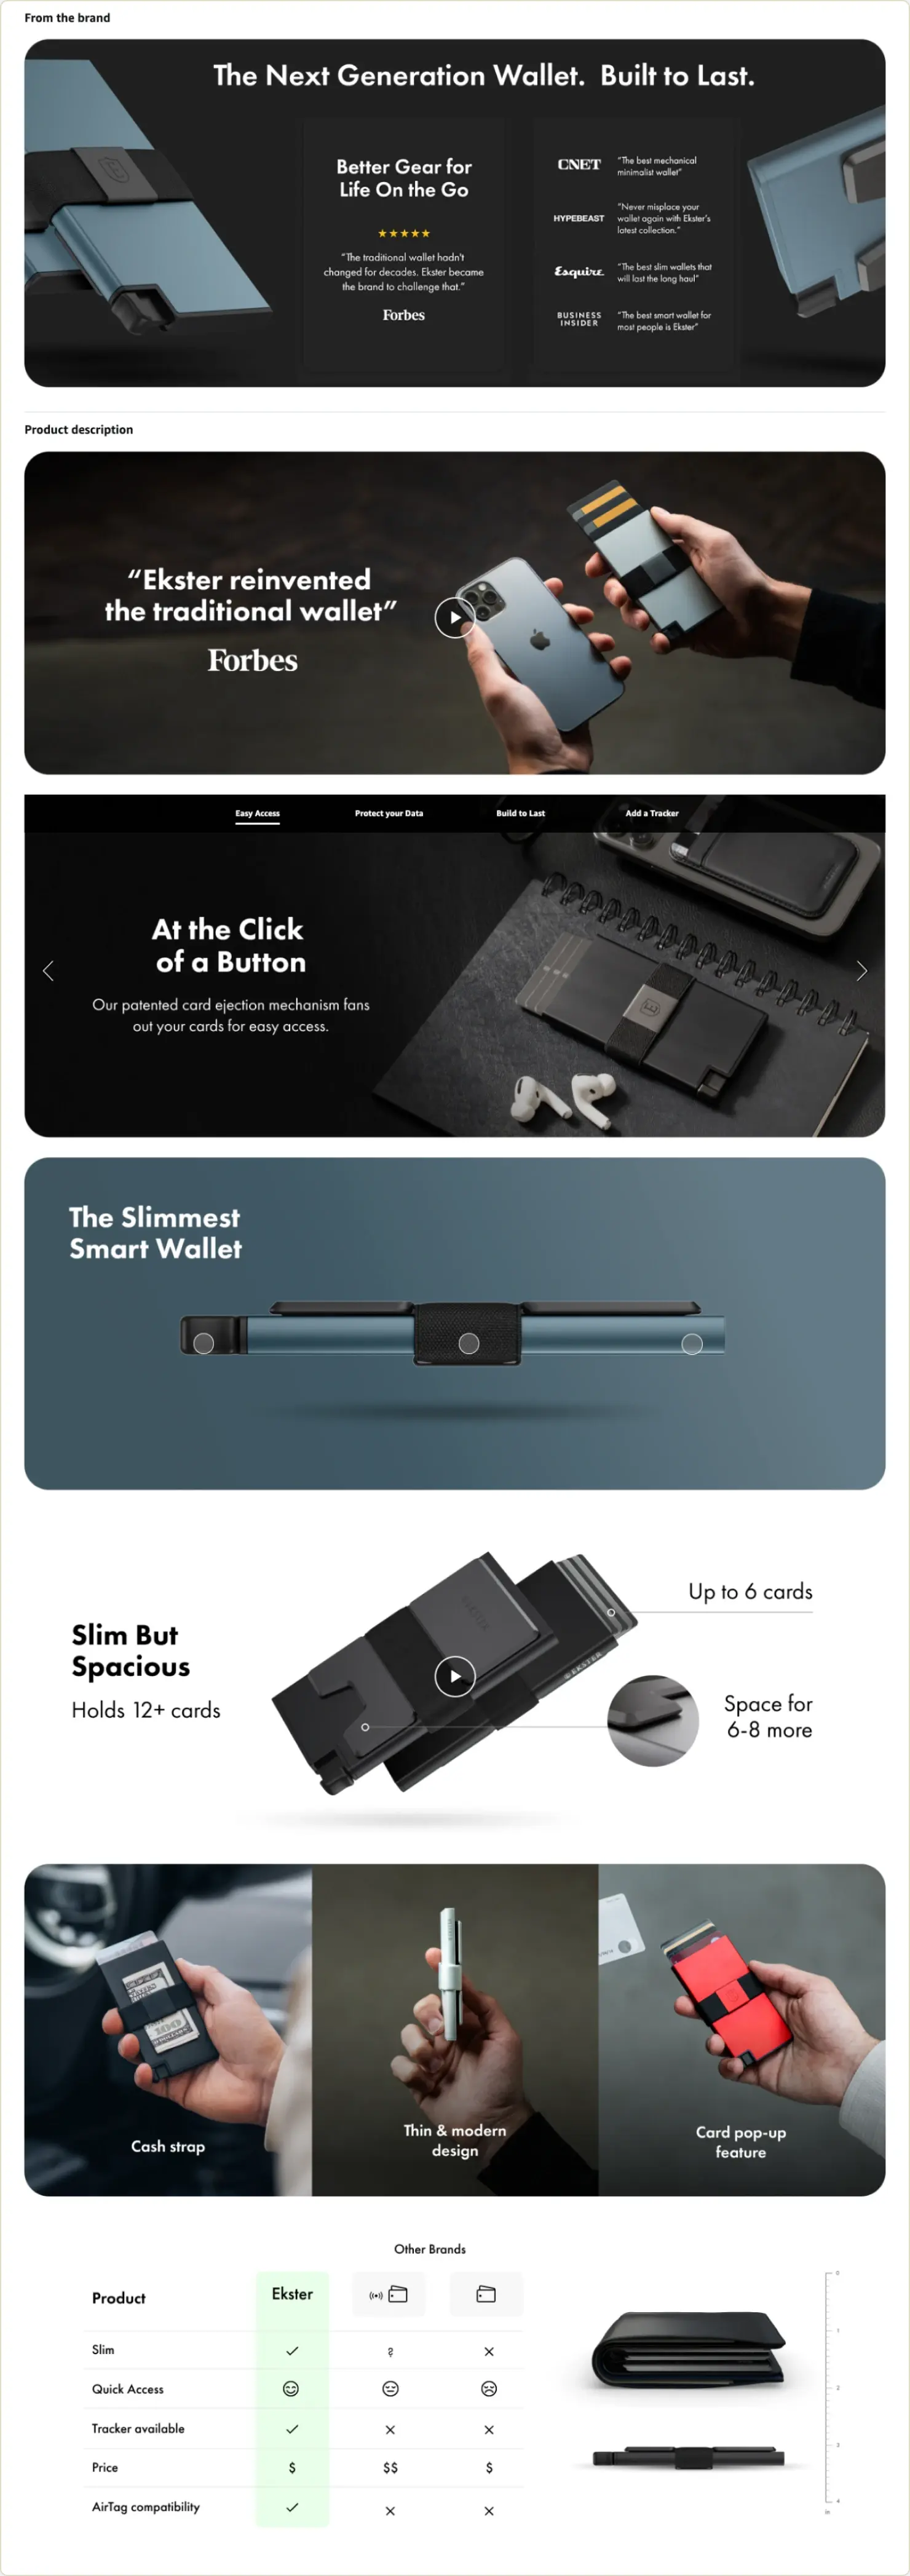
Ekster — Premium Smart Wallets
Ekster had built a successful smart wallet brand through DTC with strong sales and a loyal design-conscious customer base. The challenge wasn't the product — it was the channel. Launching on Amazon without the right listing architecture, A+ strategy, and catalog structure risks turning a premium brand into just another commodity product.
The brief for Ekster's A+ Content was specific: every module had to communicate the same quality signal as their DTC brand. RFID protection, push-button access, and the slim-profile engineering had to be front and center — because those were the differentiators that justified the premium price against cheap alternatives flooding the category.
Olifant built Ekster's entire Amazon listing infrastructure — image optimization, A+ modules, and Brand Store — as an extension of their in-house team. The result was $688,406 in annual profitability from a channel that didn't exist before, with flagship wallets becoming category leaders.
Fix A+ Content Problems: 5 Common Issues and Solutions
Even the best operators deal with rejections. Knowing how to diagnose and fix these issues quickly saves weeks of delays and prevents wasted ad spend on underperforming content.
Here's how to solve the most common A+ Content problems.
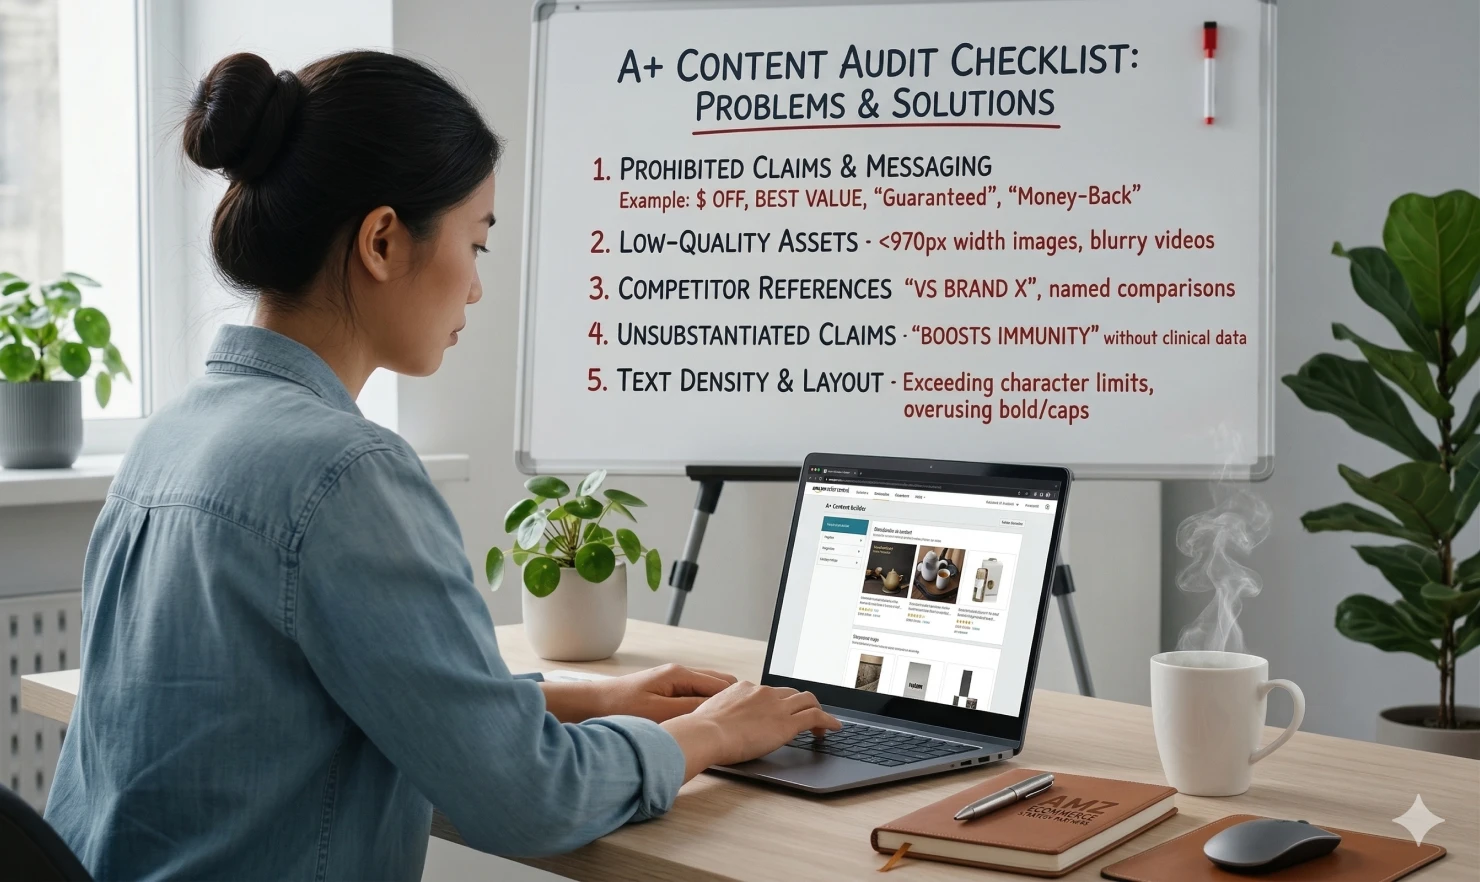
#1: Prohibited Content or Claims
Amazon flags words like "Best," "Guaranteed," or "Top-rated." They also hate "Free."
The Fix: Remove the superlatives. Instead of "The best yoga mat," say "Professional-grade TPE mat." Swap "Guaranteed quality" for "Rigorous 3-point inspection process."
#2: Low-Quality or Non-Compliant Images
If your images are blurry or have text that is too small, they will be rejected.
The Fix: Re-export your files at 300 DPI. Ensure your text is high-contrast. Avoid placing light text on a light background.
#3 Competitor References or Comparisons
You cannot mention Brand X.
The Fix: Use "Standard" or "Leading Competitor" in your comparison charts. Everyone knows who you are talking about without you breaking the rules.
#4 Unsubstantiated Health or Performance Claims
Medical claims are a fast track to a listing suspension.
The Fix: Use "Support" instead of "Cure." Describe the ingredients rather than the outcome. "Contains Vitamin C" is safe; "Stops the cold" is not.
#5: Character Limit Violations or Formatting Issues
Each module has a hard character cap.
The Fix: Use bullet points to save space. Be concise. If you are over the limit, cut the adjectives.
Low Conversion After Launch: Diagnostic Process
If your A+ Content is live but sales are not moving:
- Check the Mobile View: Are the images too small?
- Analyze the Objections: Are you answering the questions found in your 1-star reviews?
- Verify the Hero Image: Does the first module immediately explain what the product does?
Content Not Displaying Correctly
It can take 24 to 48 hours for content to propagate across all Amazon servers. If it is still missing after two days, check your "Apply ASINs" section. You might have missed the parent ASIN.
ASIN Eligibility Issues
Some categories (like used products or books) have different rules. Make sure your brand name on the listing is an exact character-for-character match with your Brand Registry name.
Appeal Process for Rejections
If you are 100% sure you are right and the bot is wrong, open a case. Provide a screenshot of the specific module and reference the Amazon policy. It is often faster to just make the edit the bot wants rather than fighting for a week to prove a point.
Using A+ Content To Support Sales Velocity At Scale
A+ Content is a conversion engine. When your conversion rate increases, your PPC spend becomes more efficient. When your PPC is efficient, your organic ranking improves. This is the flywheel effect that builds 8-figure brands.
Stop guessing what your customers want to see. Look at the data, build for clarity, and test your assumptions.
If you want help building, optimizing, or scaling A+ Content as part of a broader Amazon growth strategy, we can help at Olifant Digital. Our team focuses on conversion-first execution that turns traffic into revenue, not just better-looking listings.