Amazon Listing: How To Set it up in 2022


Introduction
If you haven’t set up a new Amazon product listing before, you may be wondering what it requires.
Even if you have set up a listing before, you may be questioning if you’re optimizing it correctly.
Either way, this article is for you.
We’ll look at both how to set up an Amazon listing as well as how to optimize it for the algorithm AND your customers.
Article content
What Is an Amazon Listing?
Your Amazon listing is more than your product page.
An Amazon listing is made up of the elements your customers see on your product page, and behind-the-scenes information that Amazon uses to index your product.
It encompasses all of your product details from manufacturing information to product images to price.
Setting up your Amazon listing happens in your Seller Central account.
How To Set Up Your Amazon Listing
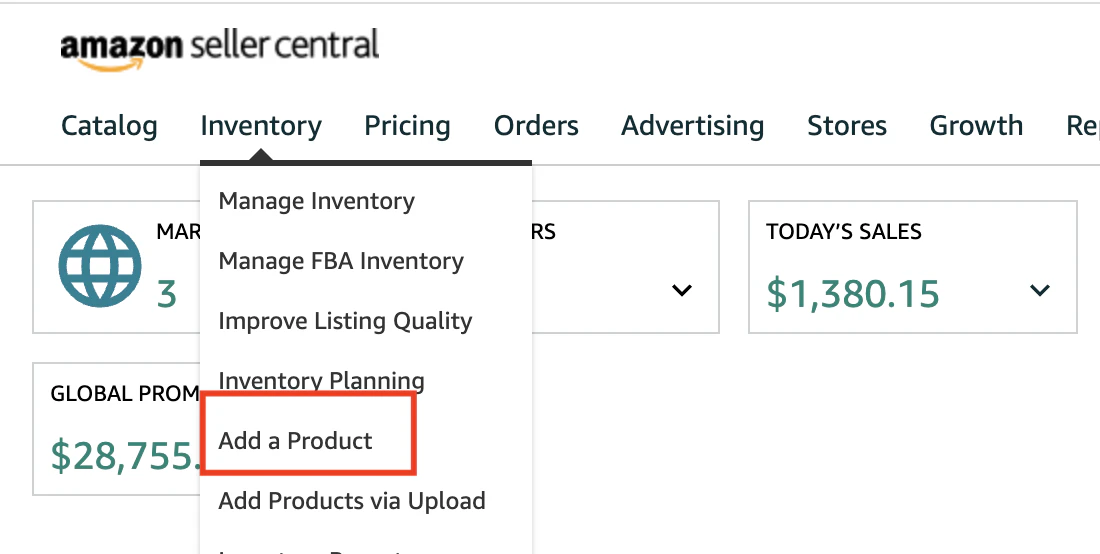
1. LOG INTO YOUR ACCOUNT, GO TO THE INVENTORY DROP-DOWN AND CLICK “ADD A PRODUCT”.

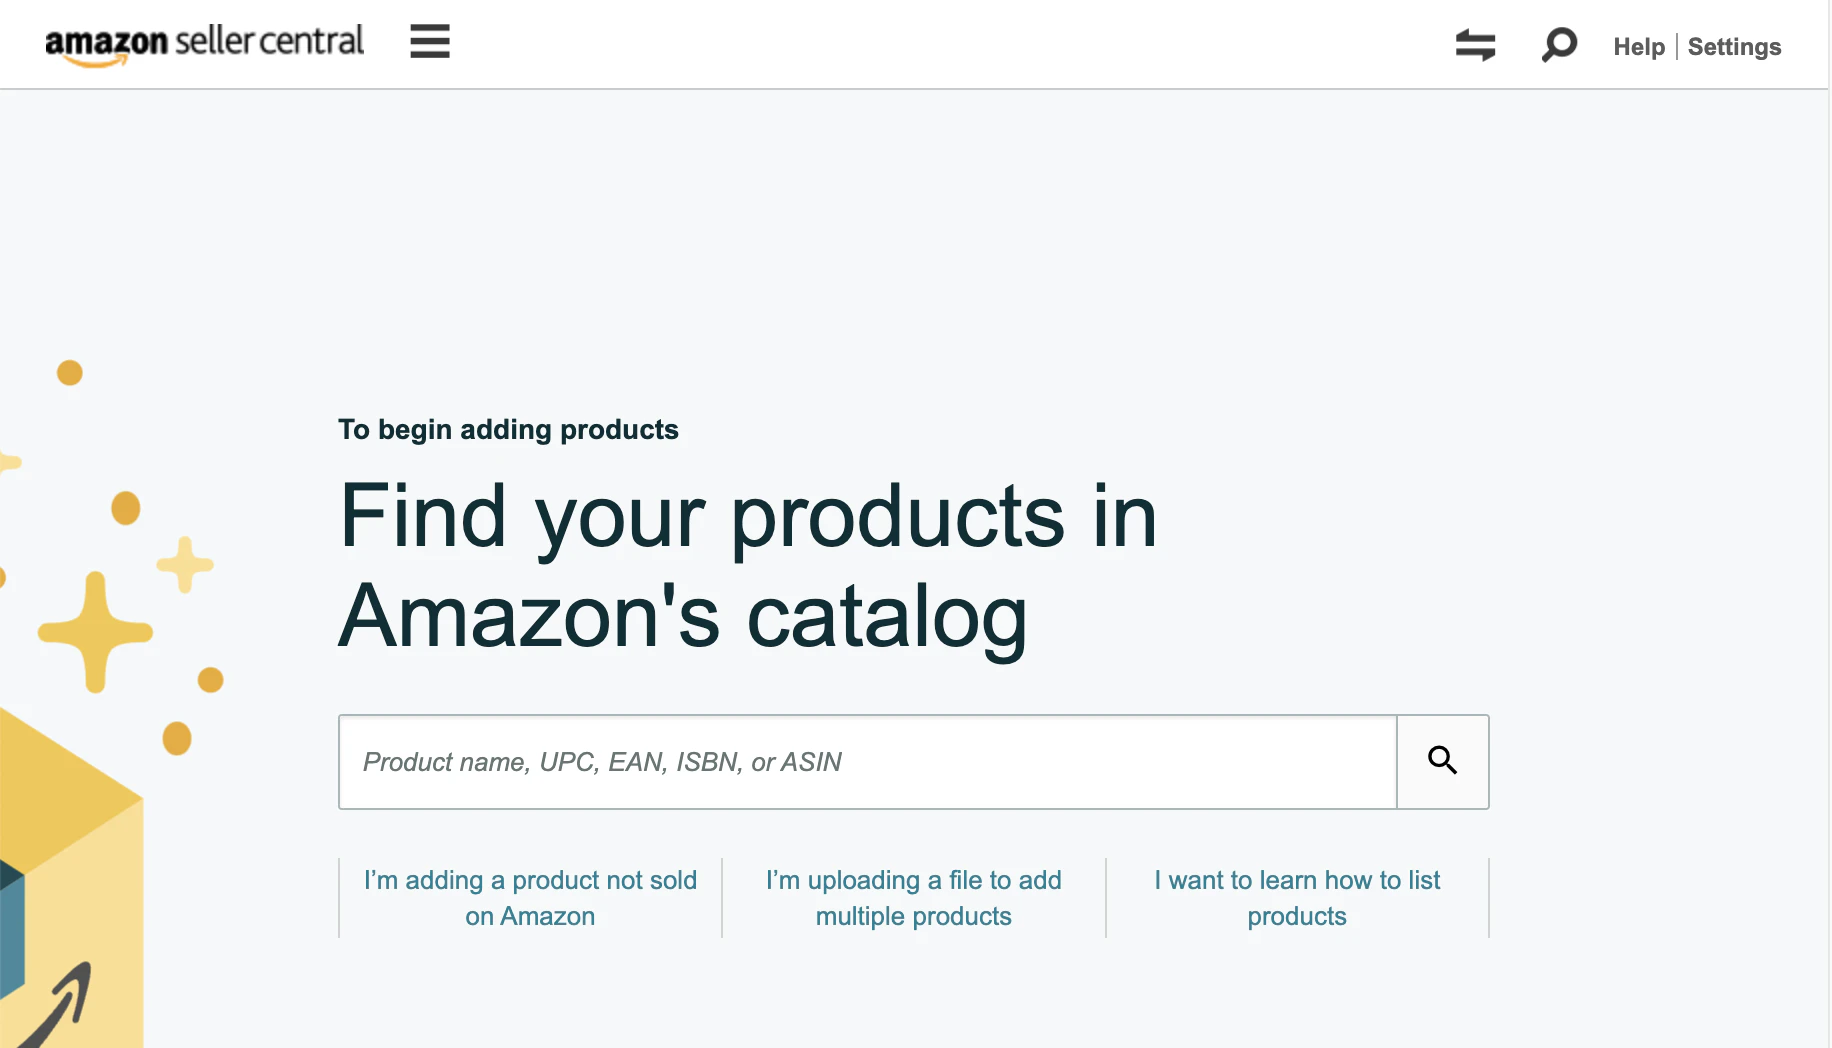
2. ONCE YOU ARE ON THE “ADD A PRODUCT” PAGE, YOU WILL SEE THREE OPTIONS FOR LISTING A PRODUCT.
Option 1 – Search for a product by name or product ID.
Option 2 – Create a new listing (use if adding a product not currently on Amazon).
Option 3 – Bulk upload (use if you are listing many products).
We’re going to look at how to create a new listing.

3. WHEN YOU SELECT “CREATE A NEW PRODUCT LISTING” YOU WILL NEXT BE ASKED TO CHOOSE A CATEGORY FOR YOUR PRODUCT.
You can do this by using the search option or by looking through the categories available.


4. IF YOU CHOOSE TO USE THE SEARCH OPTION, AMAZON WILL DISPLAY ALL POSSIBLE CATEGORIES YOUR PRODUCT MAY FIT INTO.
You’ll want to choose the one that most closely matches your product.
5. NOW YOU CAN BEGIN TO FILL IN THE DETAILS FOR YOUR PRODUCT.
Amazon breaks your product listing into seven sections.
These sections are:
Vital Info
Variations
Offer
Images
Description
Keywords
More Details
We’ll walk through each one below.

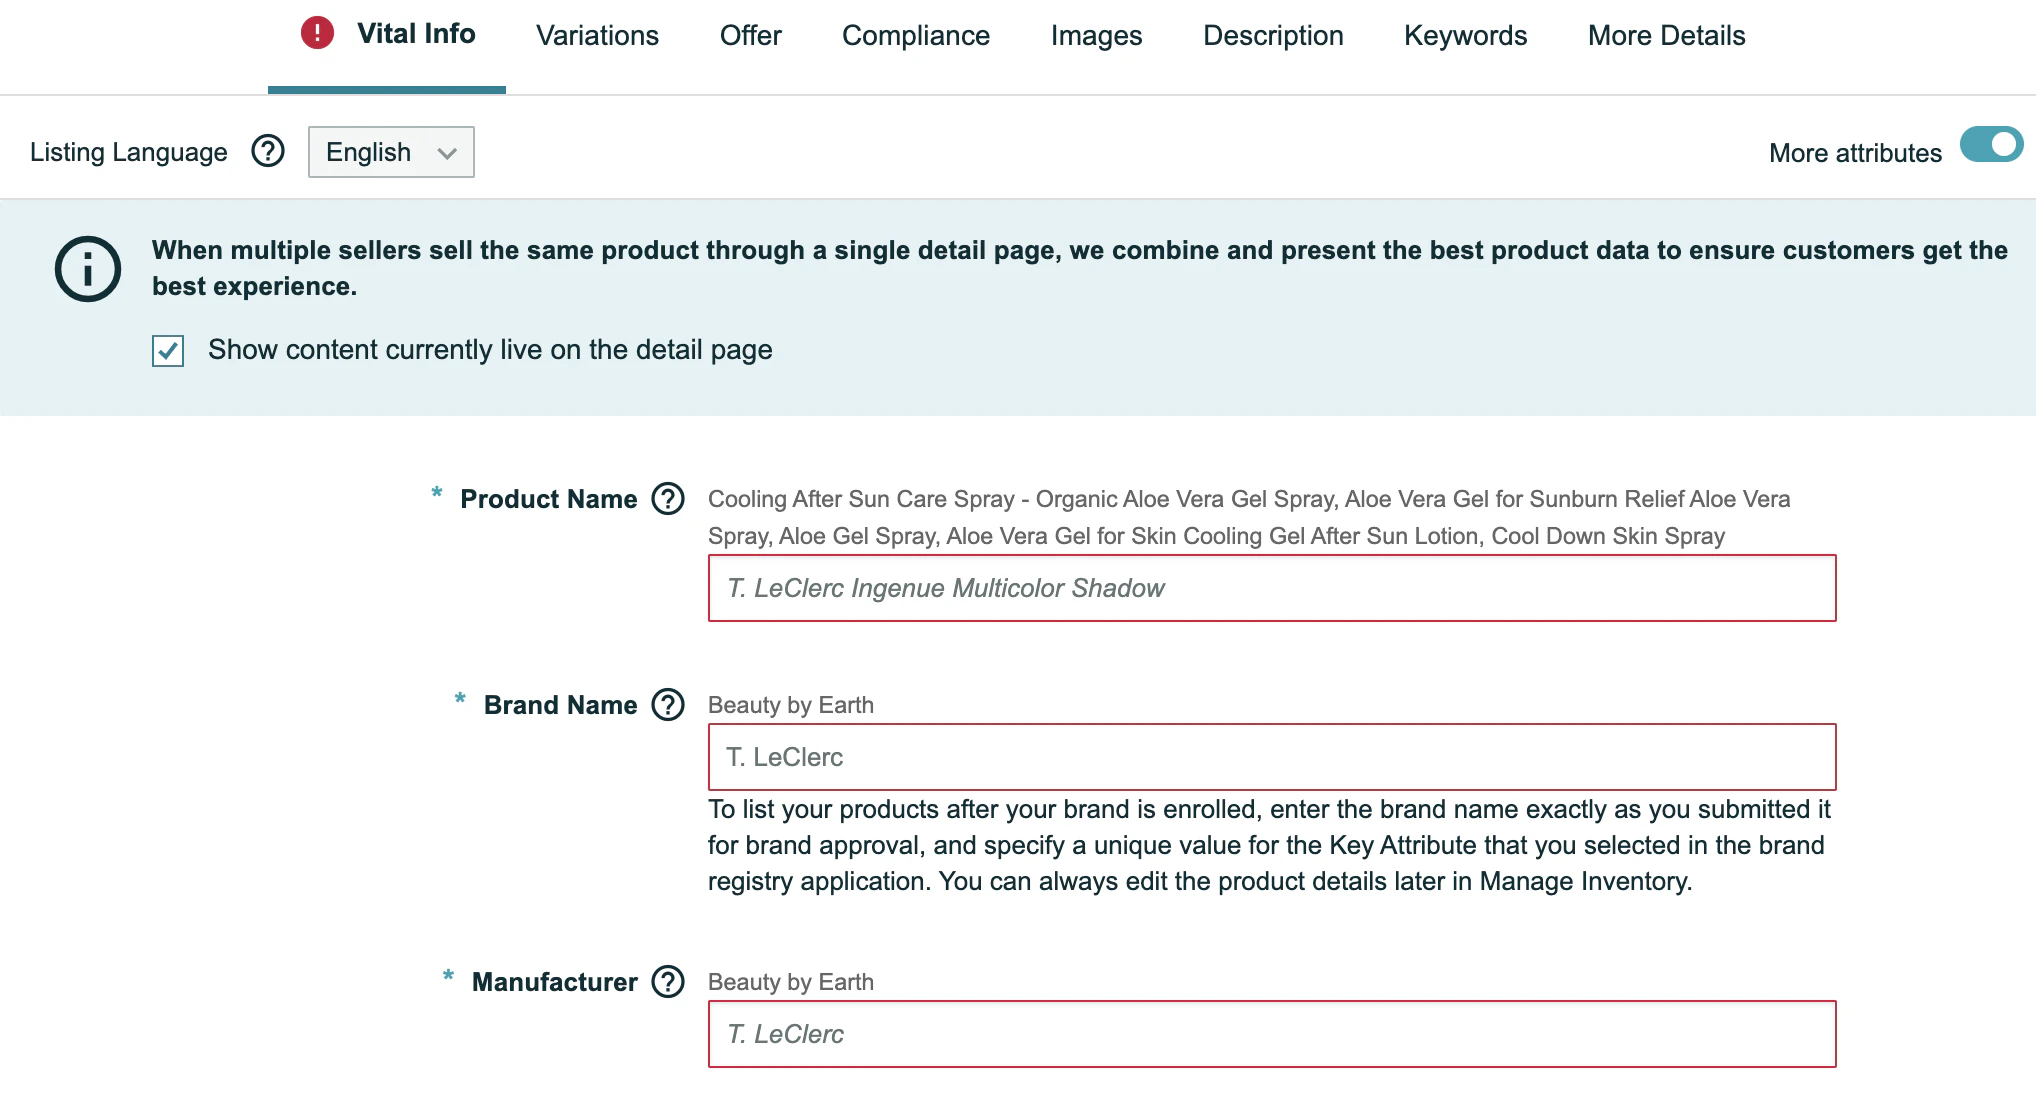
1. Product Name
Your product name (title) is the first thing your customer sees that tells them about your product. You want the first words of your product name to contain your most relevant keywords.
But you don’t want to stop there. You want to include as much information as your customer may need to determine if your product fits what they are looking for, but you’ll have to stay within the 250 character limit.
Amazon recommends you include your brand and product type, as well as product material, color, and quantity when appropriate.
2. Manufacturer and Brand Name
If you’re manufacturing and selling your own products, you’ll simply enter your brand name in both of these fields.
If you are re-selling other brand’s products, you’ll enter that brand in these fields.
3. Manufacturer Part Number
Unless you are listing a replacement part for a different product, you can skip this field.
4. Package Quantity
This field is straight-forward. Enter 1 unless you are selling a multipack of your product.
5. Material Type
Once you click in this field, it will provide you a list of materials you can choose from. Enter the material type that matches your product.
6. Color and Color Map
Here you’ll enter the main color of your product in the color field. If you plan to sell multiple colors, we’ll add those details in the Variations section. You can skip over the color map field.
7. Shape
You can enter the basic shape of your product in this field. If it isn’t relevant, leave it empty.
8. Lens Color
If your product has a lens, enter it here. If not, you’ll leave it empty.
9. Size
What you enter in the size field will depend on the nature of your product. If you’re selling a t-shirt, then the standard small, medium, large type sizing will fit. If you are selling an item like a phone charging cord, you’ll enter the length. If you are selling a drink bottle, you’ll enter the amount of liquid it can hold.
10. Hand Orientation and Tension Supported
You’ll only enter these fields if they apply to your product.
11. GTIN Exemption Reason
Most of the products you list on Amazon will require a Global Trade Identifier Number (GTIN). This is often something like a UPC. You can apply for an exemption though, and you’d enter that exemption here.
Below is the Amazon guide to product category exemptions:


12. Related Product ID Type and Related Product ID
You’ll only need to complete these fields if your product is compatible with another product on Amazon. If you’re selling protective cases for phones or tablets, you’d enter the product IDs of the models your product is compatible with here.
13. Item Display Dimensions and Weight
In these fields, you’ll enter your product’s length and width. You’ll also want to enter your product’s weight.
14. Weight Supported and Display Maximum Weight Recommendations
If your item is designed to bear weight, like a chair, for example, you’ll complete these fields.
If not, you can leave these empty.
15. Shaft Length
Again, only complete this field if it applies to your product.
16. Product ID
Every product sold on Amazon (except for the exemptions mentioned above) will need a product ID.
You’ll get this number from the manufacturer if you’re re-selling a product not made by your brand.
When selling your own product, you’ll need to buy your own UPCs. There are multiple websites out there where you can purchase UPCs for your products to use on Amazon.
That’s it – you’ve completed the first section of your new listing.
VARIATIONS

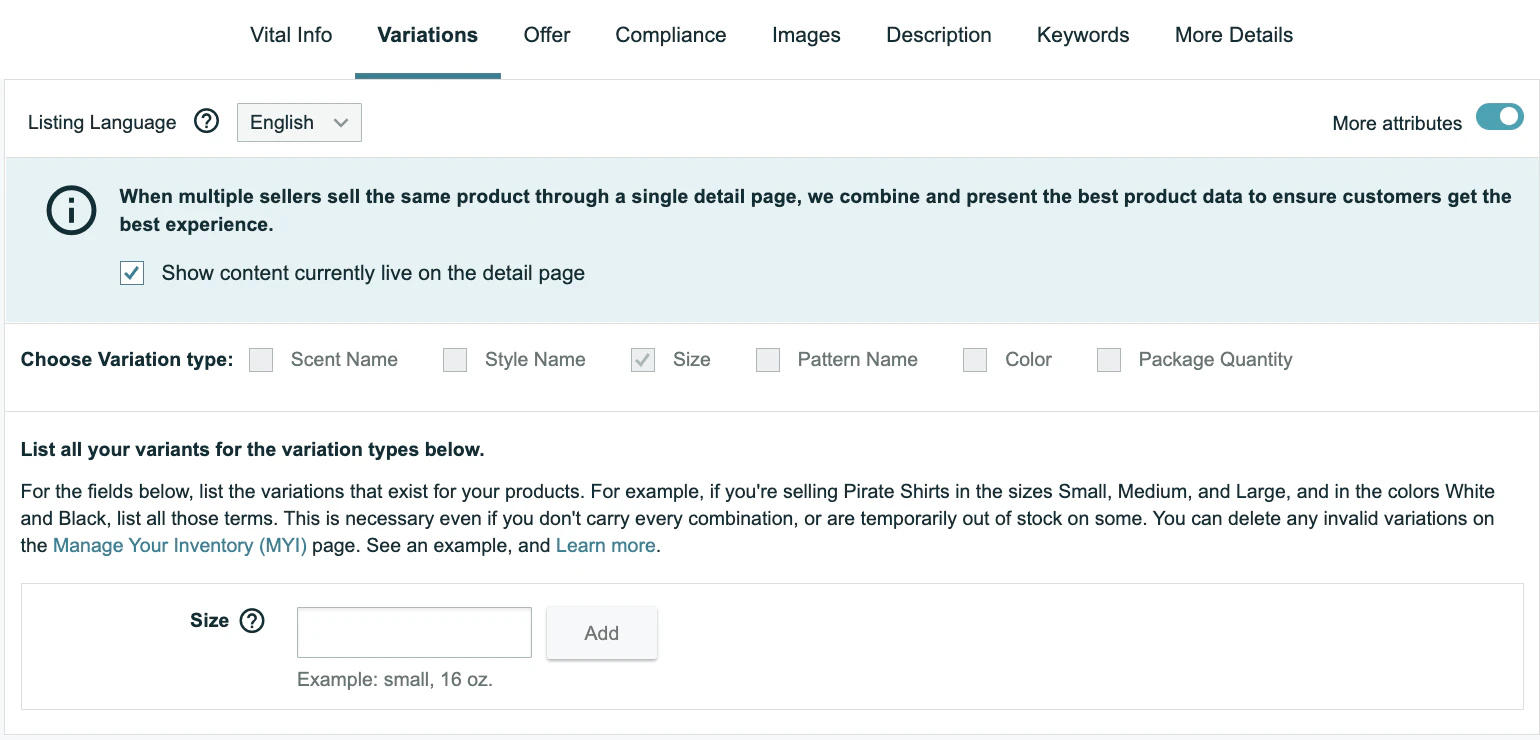
If your product comes in different colors, sizes, designs, or other types of variety, this is where you’ll enter that information.
First, select the drop-down menu on the variations section and choose the variation type relevant to your product.
Once you select the type of variation, additional fields will be displayed to you.
Enter the basic information in the necessary fields, and click “Add Variations” once you’re done.
Your variations will be created and you will enter the details for each one.

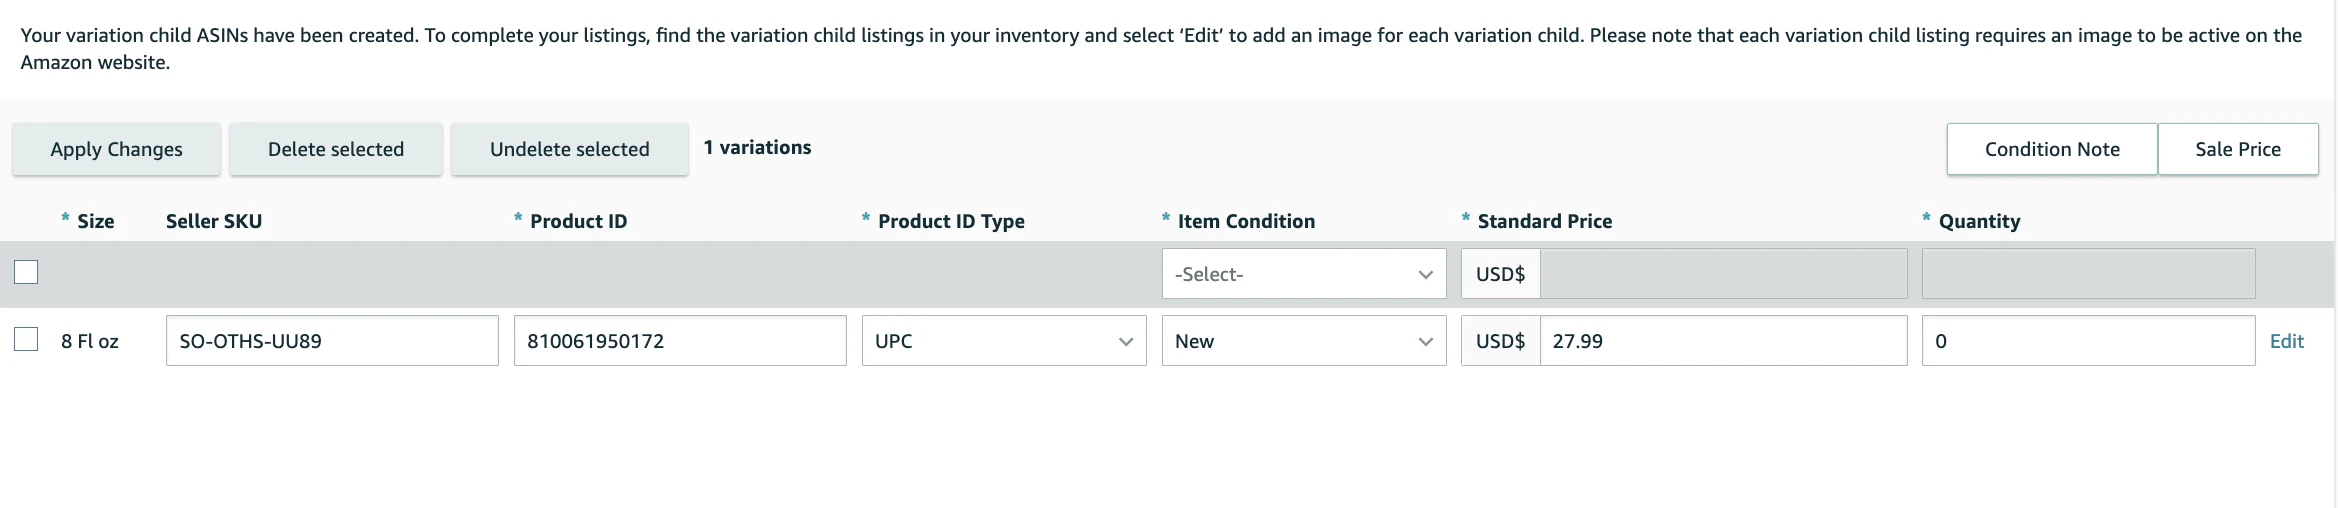
Simple as that! Now to the offer section.
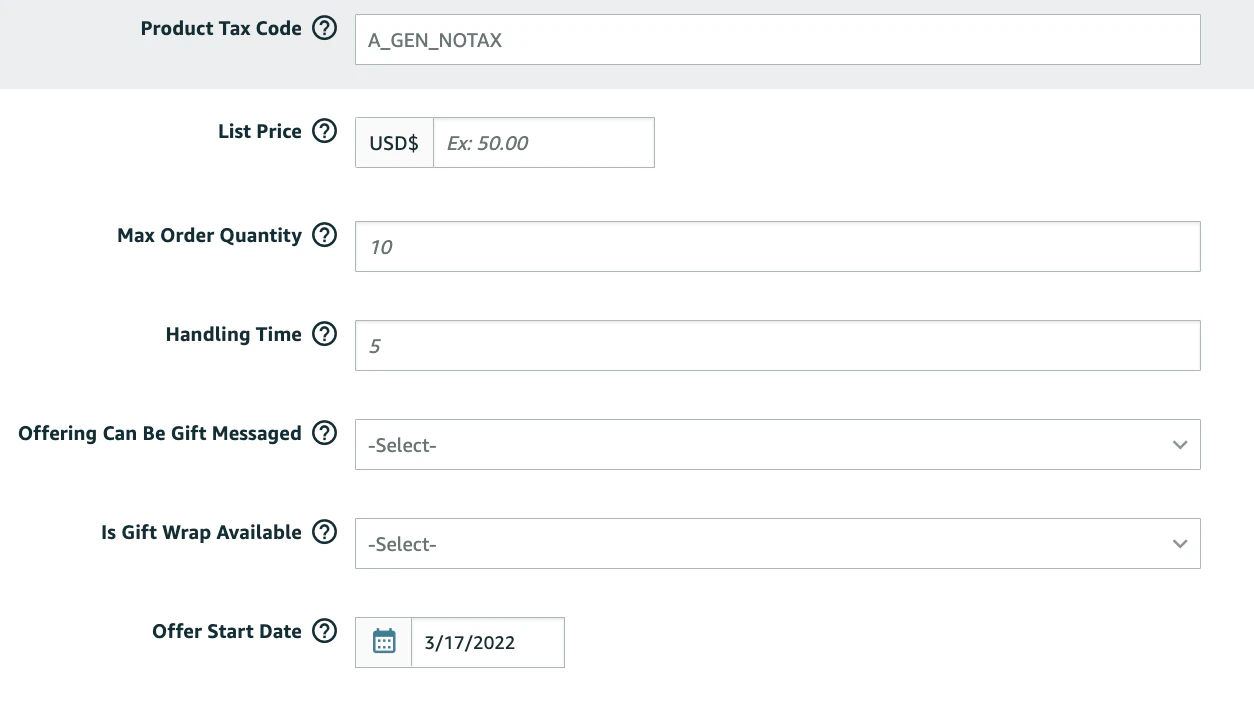
Product Offer Information

Images

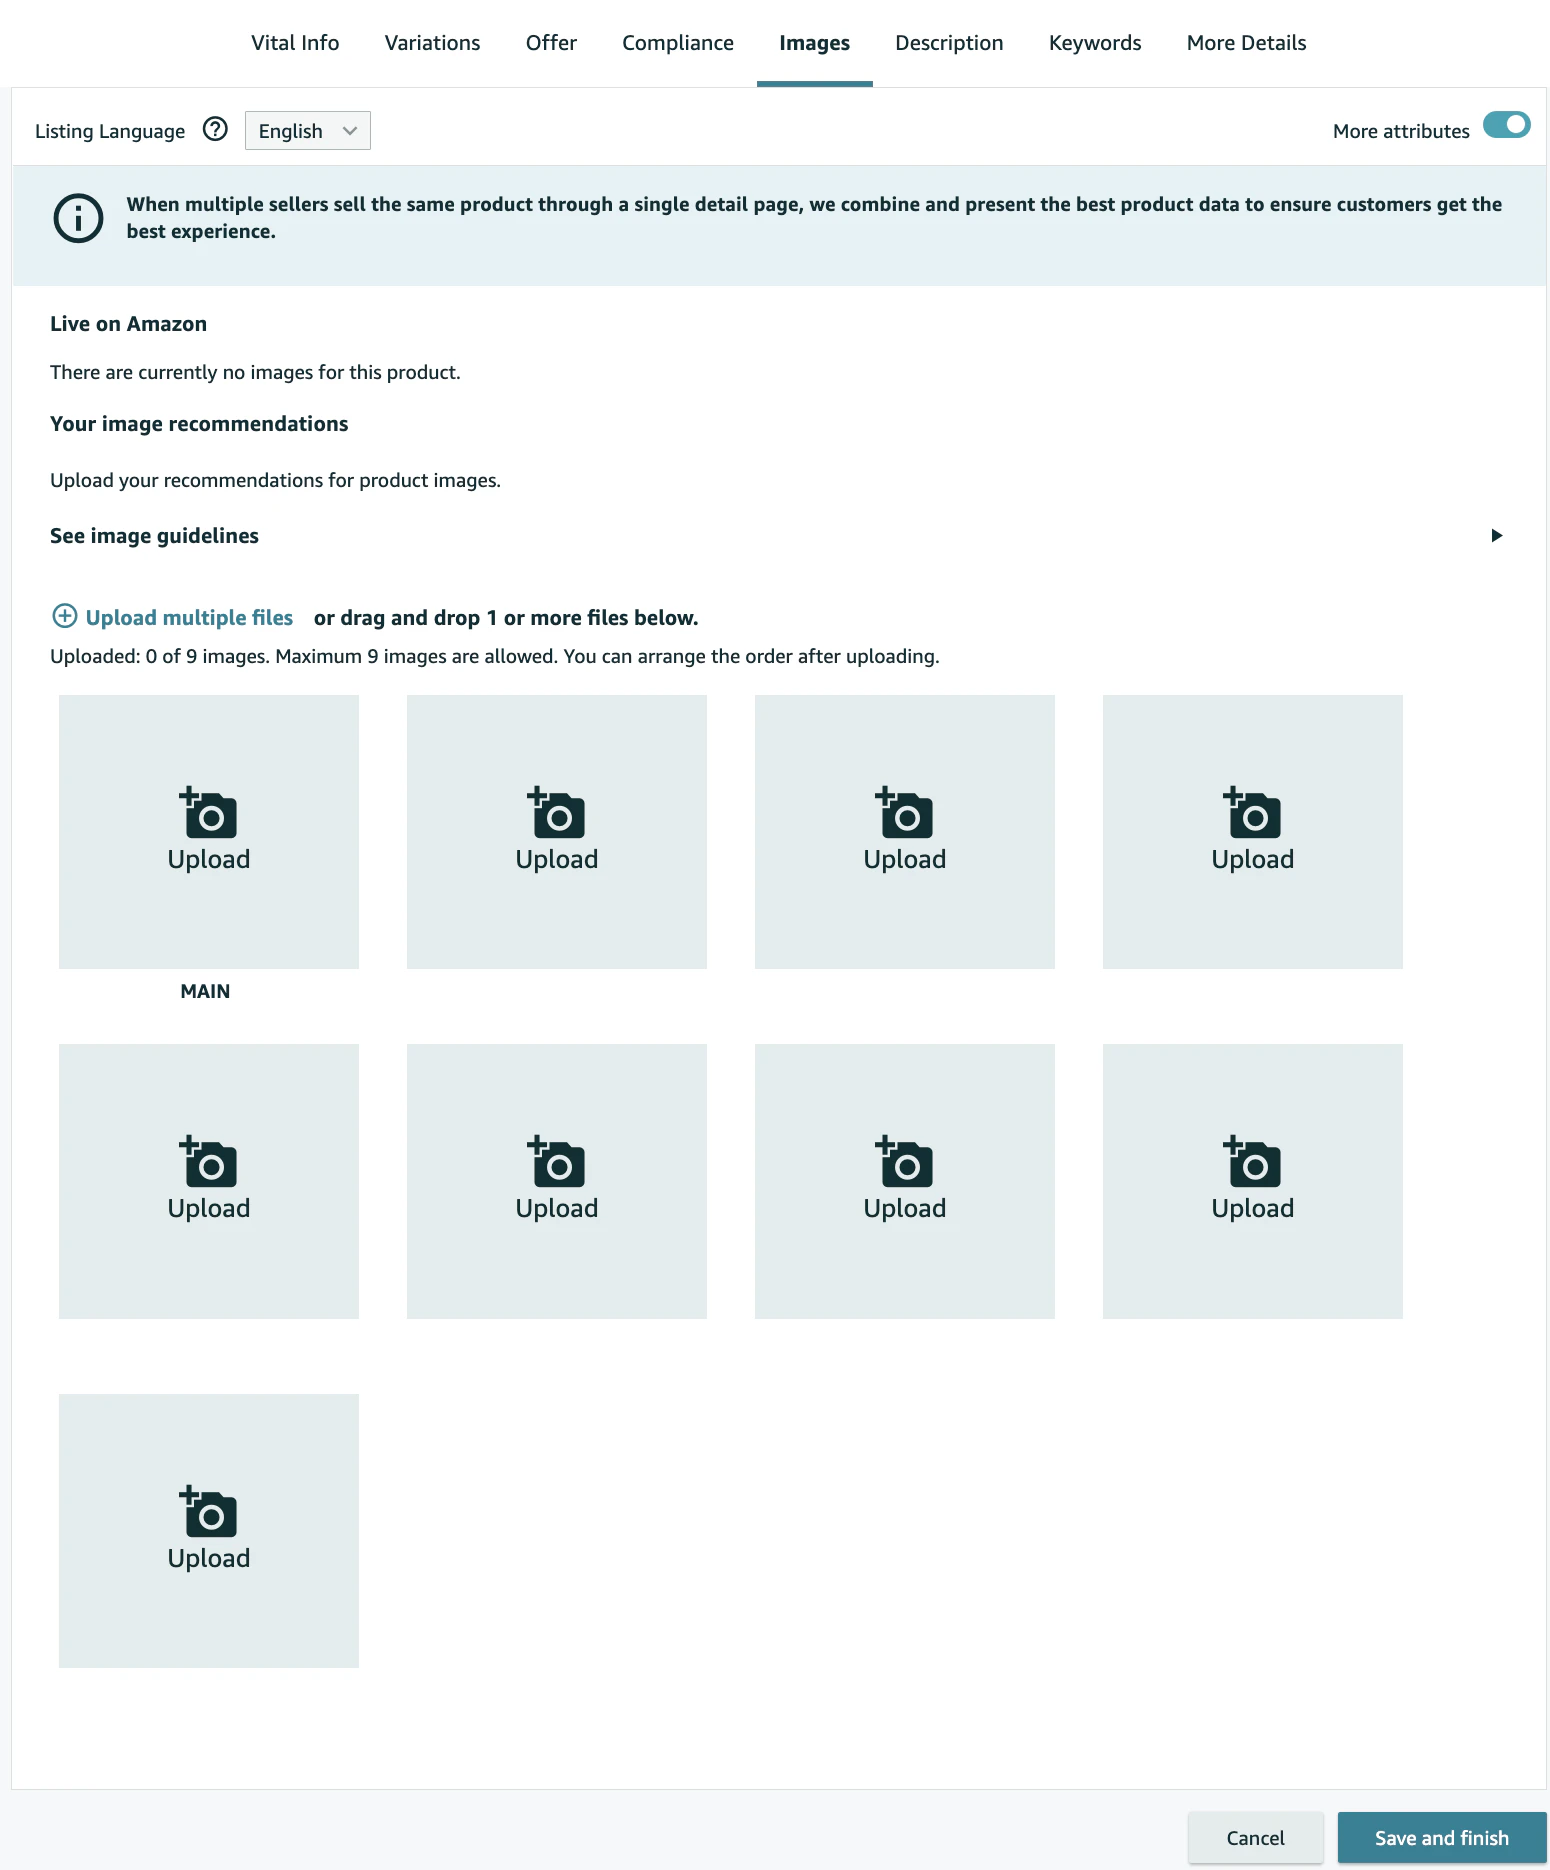
In this section, you’ll upload your product photos. Be sure you are compliant with Amazon’s guidelines.
You can find the guidelines on Amazon Seller Central.
We’ll also go into more detail on how to optimize your product images a little further down in this article, so keep reading.
But for now, let’s move to the next section.
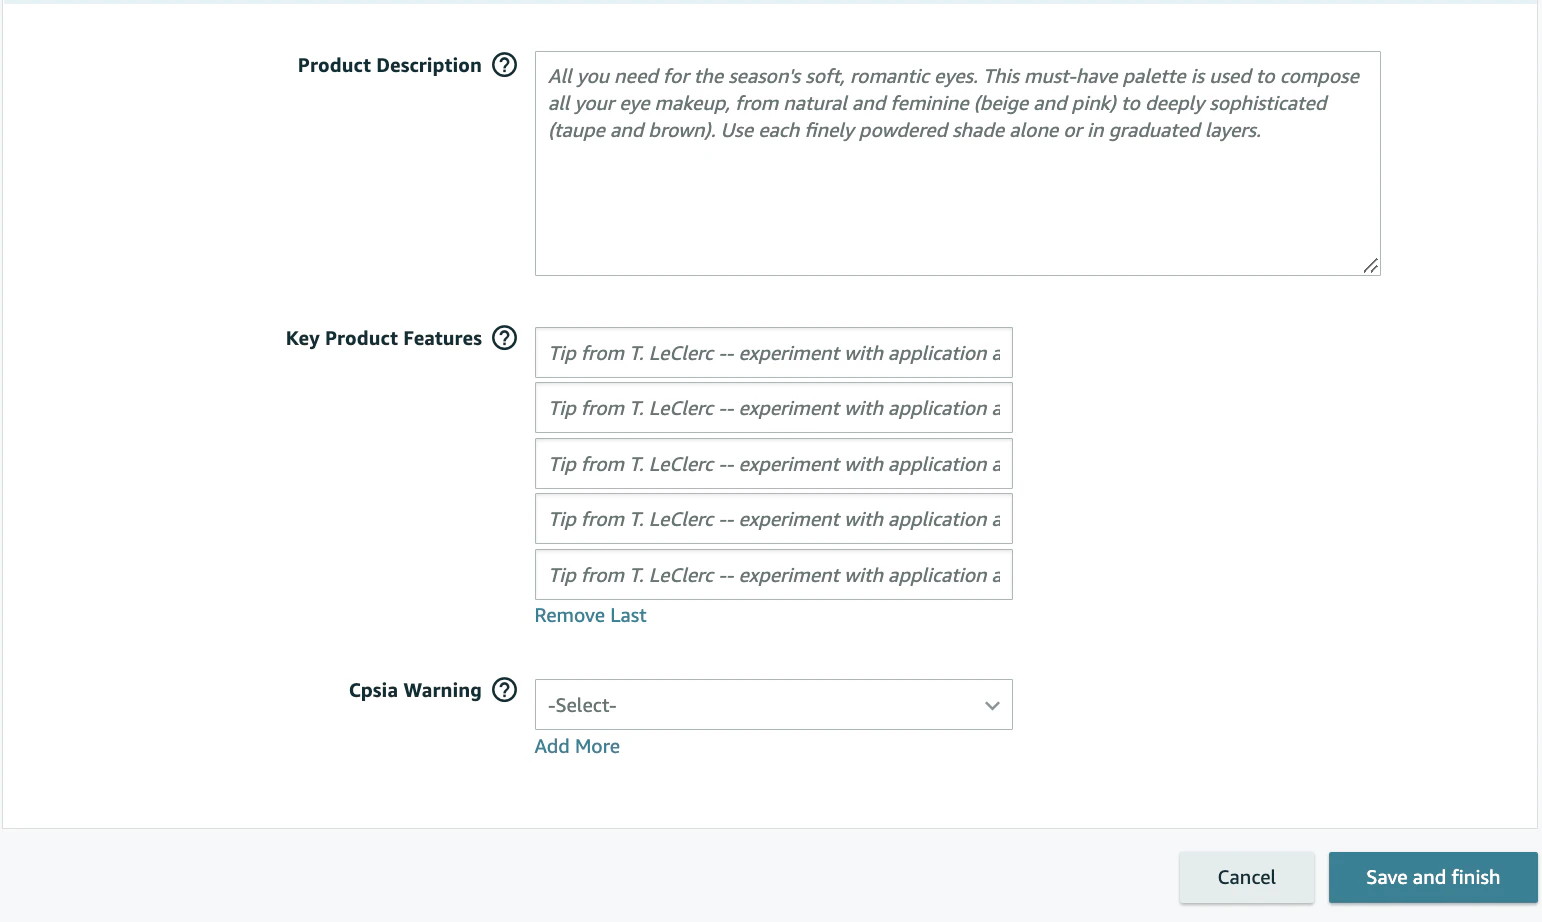
Description


Your product description will have two pieces to it.
The first part is “Key Product Features”. These will be your bullet points.
The second part is your “Product Description”, the block of text under your product.
Key Product Features (Bullet Points)

There are a few key points you want to remember when filling out your key product features.
You want to include keywords here that you didn’t include in your product title.
You want to frame your features so that they highlight the benefit the customer gets from using your product.
You want to keep them short and easy to scan.
Product Description

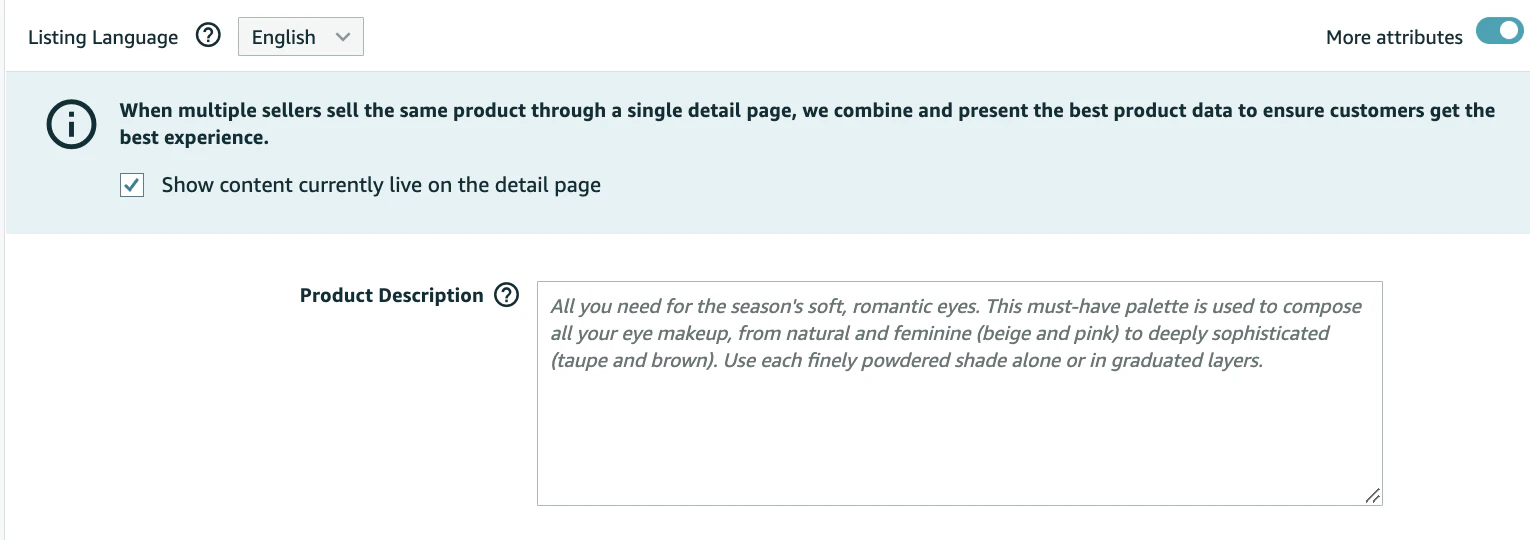
Amazon gives you 2,000 characters for your product description. You can add additional keywords here as well, but the focus should be on giving your customer the information they need to purchase your product. Be sure you are using capitalization and punctuation in your description to make it easy for your customer to read.
Your listing is almost done. Next, keywords.
KEYWORDS
Keywords are an essential part of how Amazon determines what product listings to include in customer searches.
If you need additional help with keyword research, take a look at our complete guide to Amazon keyword research.
The keywords you enter here are your “backend keywords”. These are keywords your customer won’t see, but Amazon will index them and use them in their algorithm.
Don’t add keywords you’ve already used in your product title or product description.
You’ll have options to enter “Search Terms” and “Platinum Keywords”.
1. Search Terms
This is where you will enter all of your keywords that you want Amazon to connect with your listing but don’t want your customers to see or don’t fit in your listing. You only have 250 bytes to use here.
2. Platinum Keywords
Platinum keywords are most likely not relevant to you. There was previously a premium merchant program that has been discontinued, and now this field is reserved for high-level brands that use the platform. Entering keywords here will not help your listing.
Ignore the Platinum Keywords section unless you are a Platinum Seller, of course.
You’ll also be asked to select options for “Subject Matter”, “Other Attributes”, “Extended Use” and “Target Audience” fields.
It may seem like a lot, but you need to be sure to complete every field on this page fully. Amazon uses it to index your product and it’s better to give them more information than not enough.
Only one section left!
MORE DETAILS

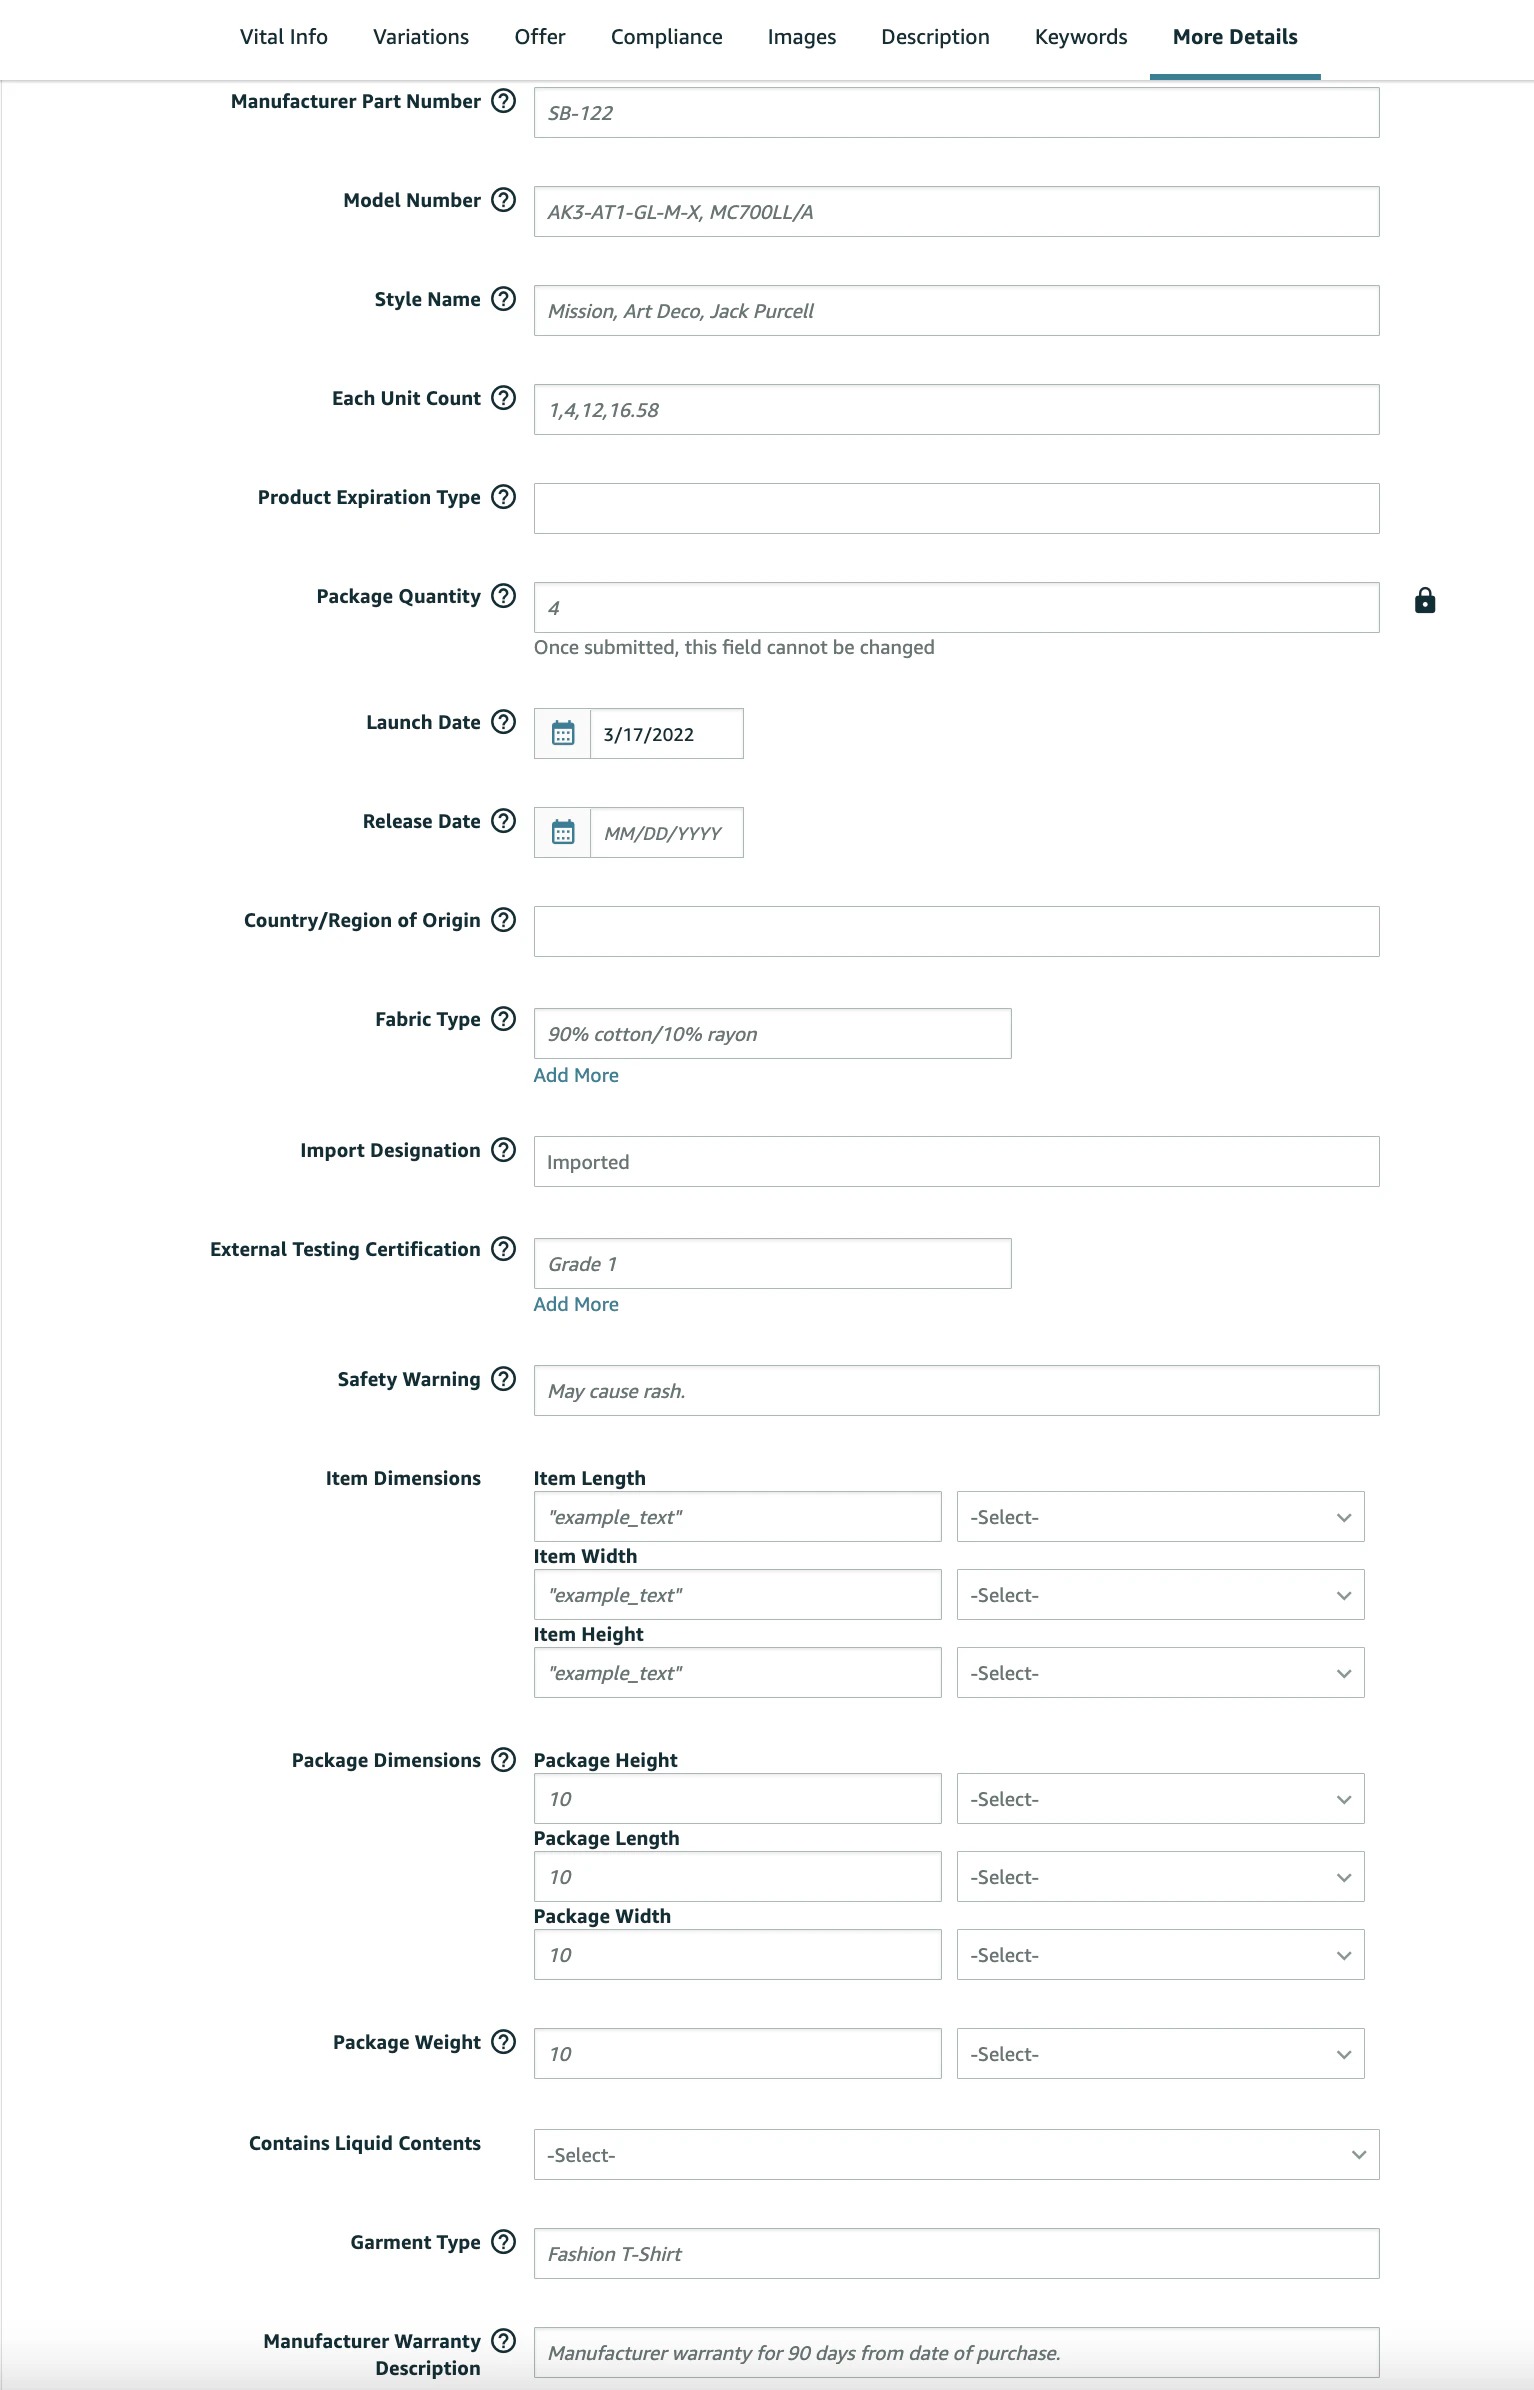
The final section is where you’ll enter the final details Amazon needs to list your product.
It’s quite long, but it’s also self-explanatory. Just go through and complete each field related to your product.
The key information on this page every product will need is the Manufacturer’s Suggested Retail Price (MSRP) and your product’s Sale Price.
The MSRP is not the price you are listing your product for. It is the price that will show as the “List Price” that Amazon will anchor your actual listing price against. Your price should be equal to or lower than this.
The Sale Price is the price Amazon will list your product for. When you are setting your price it is a good idea to look at what similar products are listed for. Amazon will take this into account when they rank your product.
Once you’ve completed the more details tab, that’s it. You’ve completed the process to list your product on Amazon.
How To Optimize Your Amazon Listing
Knowing how to add your listing on Amazon is just the first part of getting sales.
You need to know how to optimize that listing so that both your customers and Amazon are drawn to it.
There are four main areas you can optimize – keywords, product descriptions, description formatting and images.
Let’s start with your keywords.
SEO-FOCUSED KEYWORDS

SEO keywords are more than a term describing your product.
When choosing SEO-focused keywords, you need to know the search volume of the keyword and how competitive that keyword is.
As a rule, keywords with a high search volume are going to have more competition. You might want to start with a focus on long-tail keywords.
Here are some things you need to consider when adding keywords to your listing.
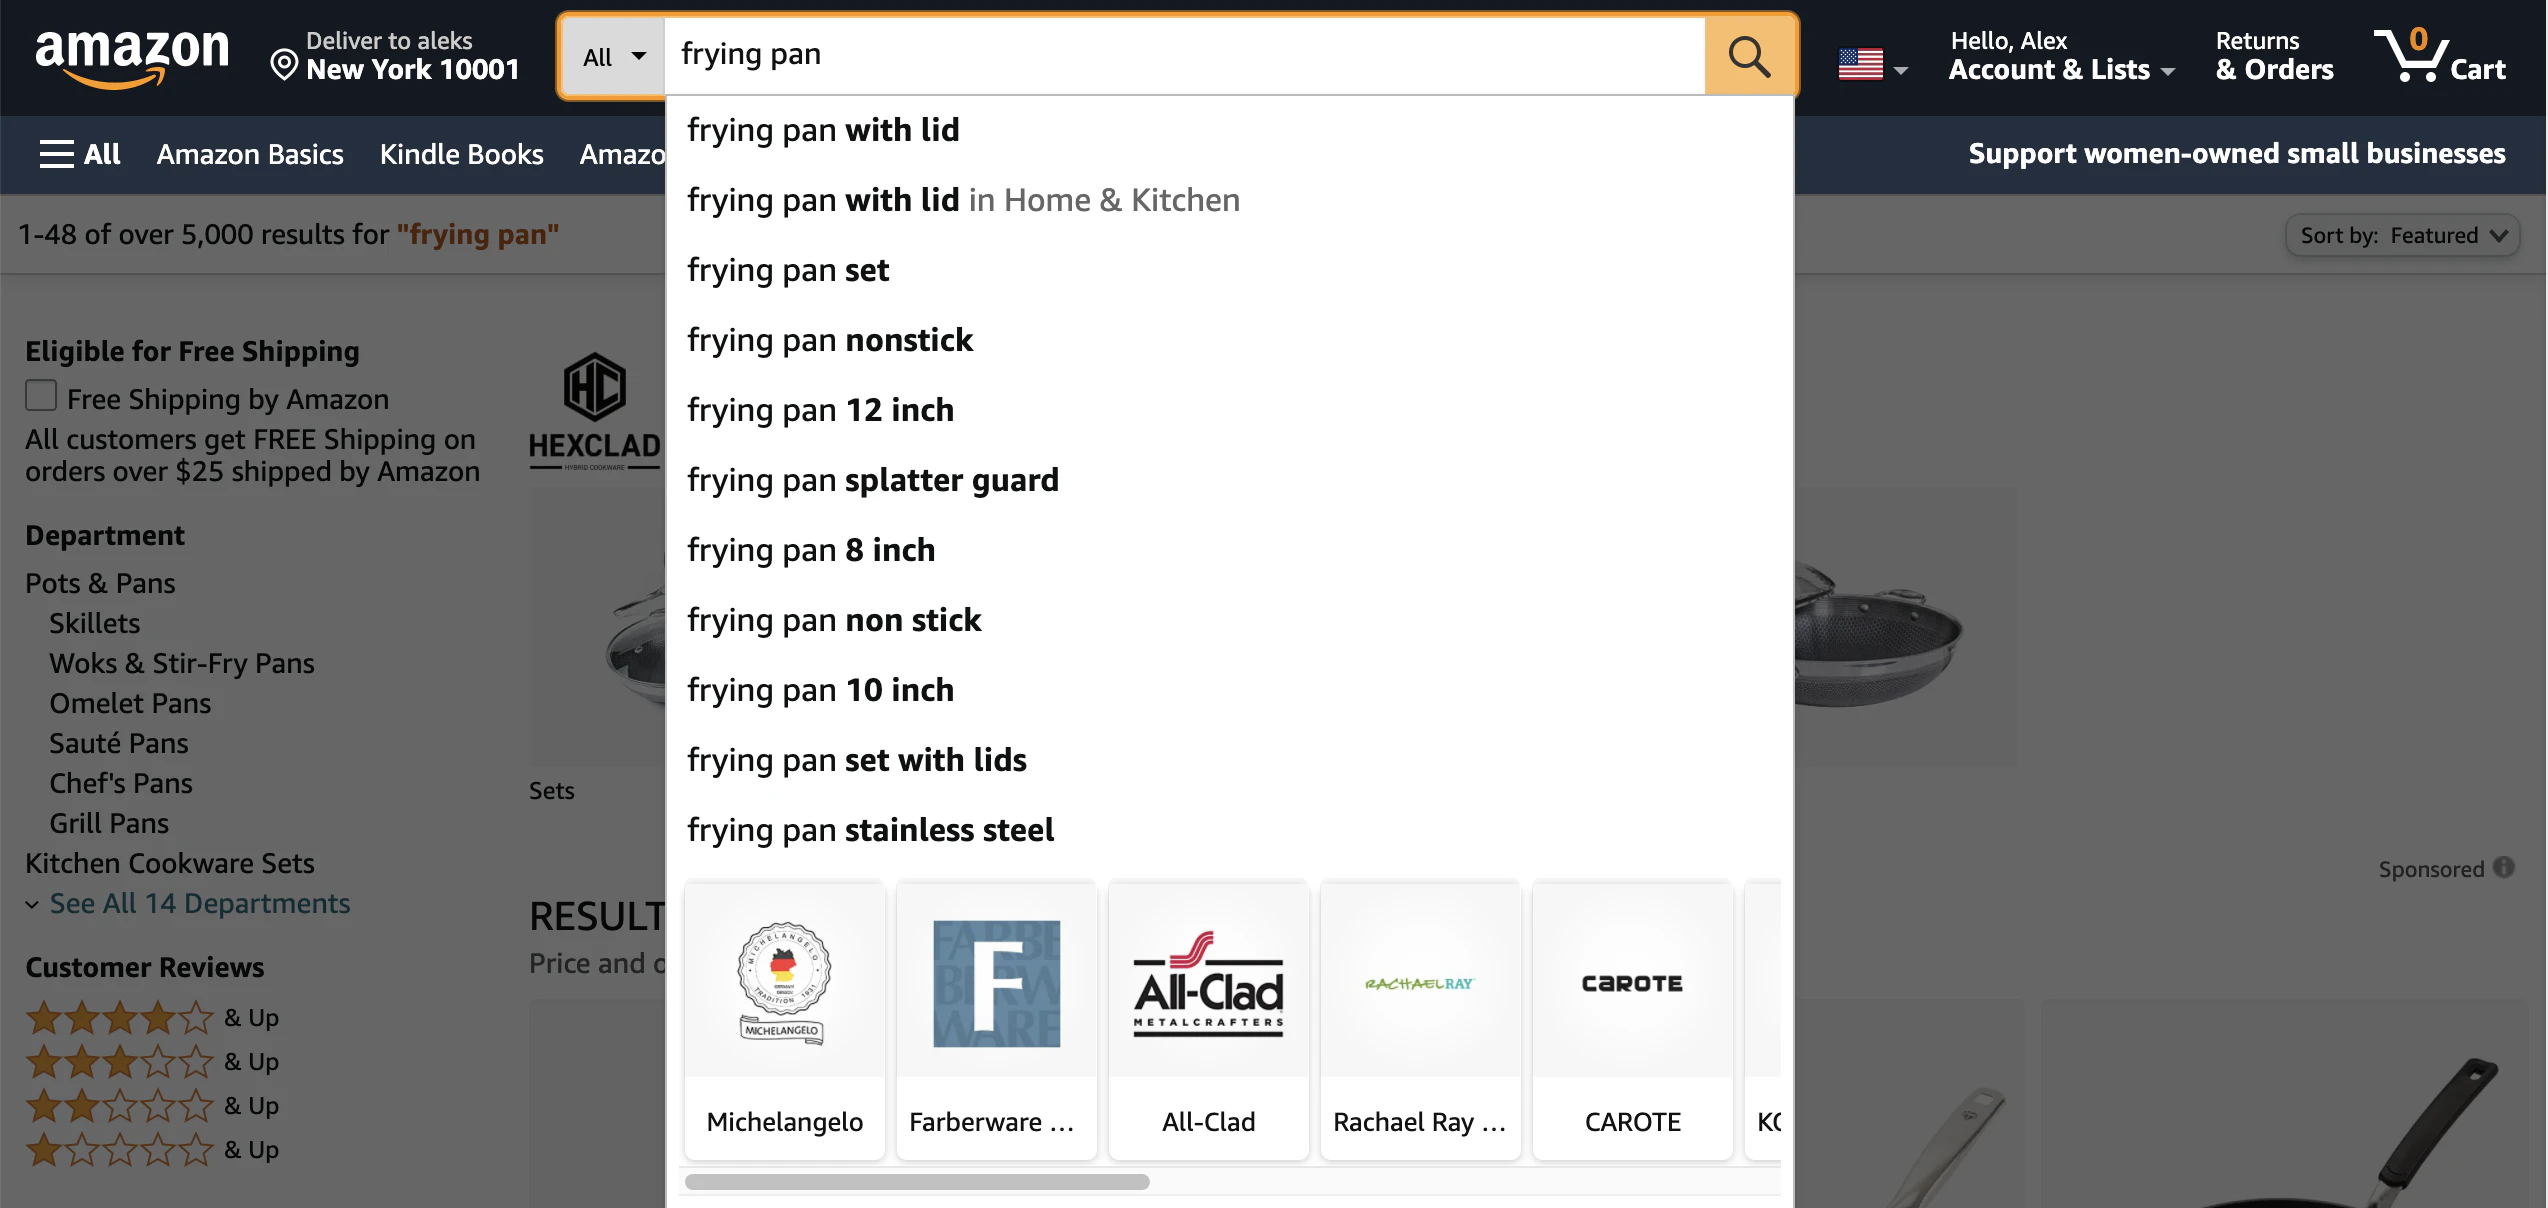
1. Use your strongest keywords in your product title.
You want to include your most descriptive keywords at the beginning of your product title. This helps Amazon identify what your product is. It also helps customers skimming the search results to know if your product is for them without having to read the whole title.
Including keywords in your product title is an important part of optimizing your SEO, but be careful not to use too many keywords. There is a fine line between using keywords to help the search engine and making your product title confusing to your customer.
Remember, if your customers are too confused to click-through then your keywords don’t matter anyway.
2. Place your keywords consistently throughout your listing.
You want to use keywords not just in your product title, but throughout your listing.
Sprinkle your keywords into your product description a handful of times where they will enhance your listing. Don’t use keywords for the sake of using keywords.
Your product description’s job is to get your customer to buy, so keywords should be your secondary focus behind clearly demonstrating the benefits of your product.
3. Include variations of your long-tail keywords.
Once you’ve used a keyword in your listing, whether that be in the product title, product description or backend keywords, you don’t want to use it again.
When you are doing your keyword research, be sure that you gather enough long-tail keyword variations to include.
For example, if you are selling bedsheets some variations might be “blue cotton bedsheets”, “queen size cotton bedsheets” and “cotton bedding set blue”.
EASY-TO-SCAN FORMATTING
Overall, your product listing needs to be formatted so that it is easy for your customer to skim through and find the details they need.
If you make it hard for customers to get answers, they will leave your product page and never look back.
1. List your product’s biggest selling point in your first bullet point.
Just as you need to add your most valuable keyword to the front of your product title you should also put your product’s best selling point first in your bullets.
If your product title does its job, your first bullet is the second piece of information your customer reads.
You need that bullet to be appealing enough to make the customer keep reading.
2. Test writing your product features in all capitals.
Since Amazon doesn’t allow you to bold or underline in your product listing, some sellers get creative to highlight the most important parts of their product’s features.
This idea is worth testing for your product.
Just don’t write too much of your product description this way or it defeats the purpose.
3. Make your bullet points clear and concise.
There is a reason Amazon chose to create product listings with bullet points. Their priority is creating the best shopping experience possible.
Bullets – when done right – are easier to comprehend than blocks of text.
Don’t take away from the experience by making your bullet points too long.
DETAILED PRODUCT DESCRIPTIONS

Your product descriptions should do more than describe your product. They should entice your customers to buy.
Part of this is clearly illustrating what your product does and part of it is showing why it matters.
You need to know how to use every piece of your listing to its fullest potential.
1. Product Title
As a reminder, some of the things Amazon recommends you include in your product title are:
Brand
Product Type
Product Material
Color
Quantity
It’s a good idea to use Amazon’s recommendations for your product title, but you can tweak the information to fit your best keywords.
You can also include descriptive words that would appeal to your customers like “premium” or “long-lasting”.
Whatever you choose, remember that you only have 200 characters (about 70 on mobile) so you want to make the most of them.
2. Product Bullets (Features)
Your bullet points (the product features fields when listing your product) are likely the first thing your customer reads once they decide to click-through.
Bullet points are appealing because they offer an easy way for customers to learn the main benefits of your product quickly.
To make the most of this space you want to pair each of your features to the overall benefit.
If you sell plastic spray bottles, don’t just tell your customers it’s BPA-free. Explain to them that they are BPA-free so it’s healthier for them and the environment. BPA-free may mean nothing to your customer if you don’t explain why it matters.
3. Product Description
Your product description is the block text that is under your bullets in your listing.
If your customer has made it through your bullets to this part of your listing, this is your chance to deliver the final pieces of information they need to make a decision.
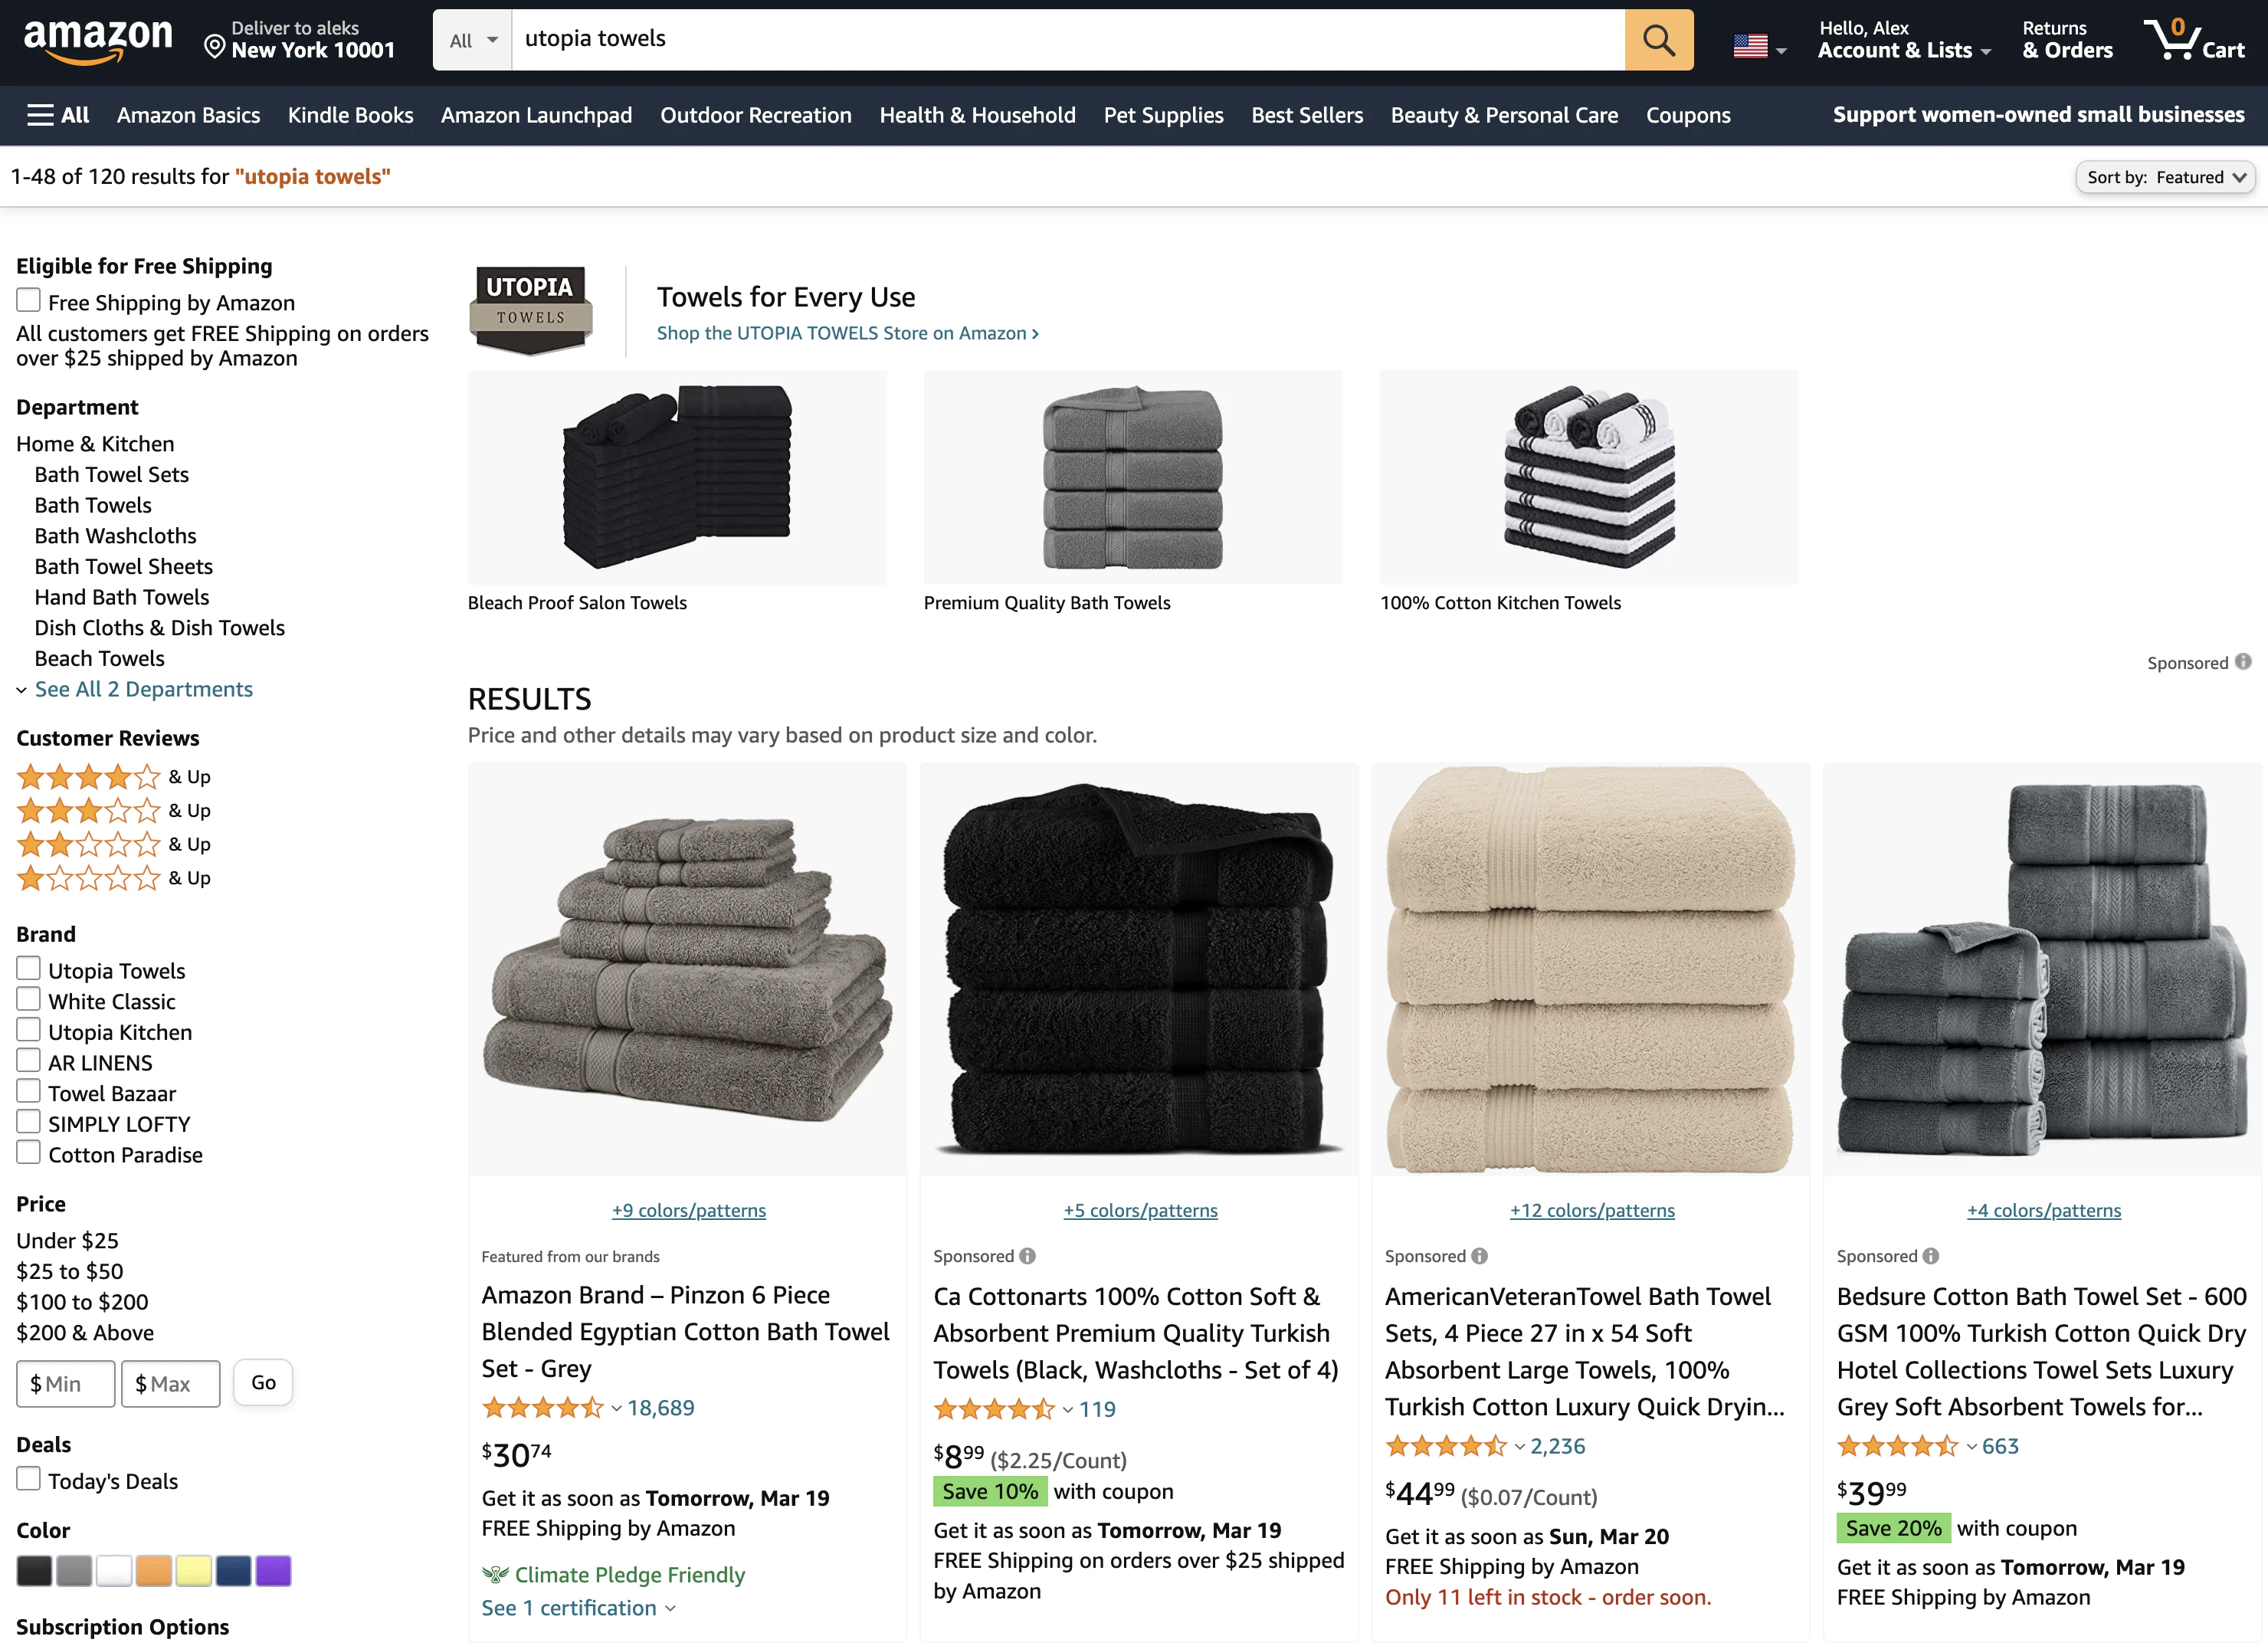
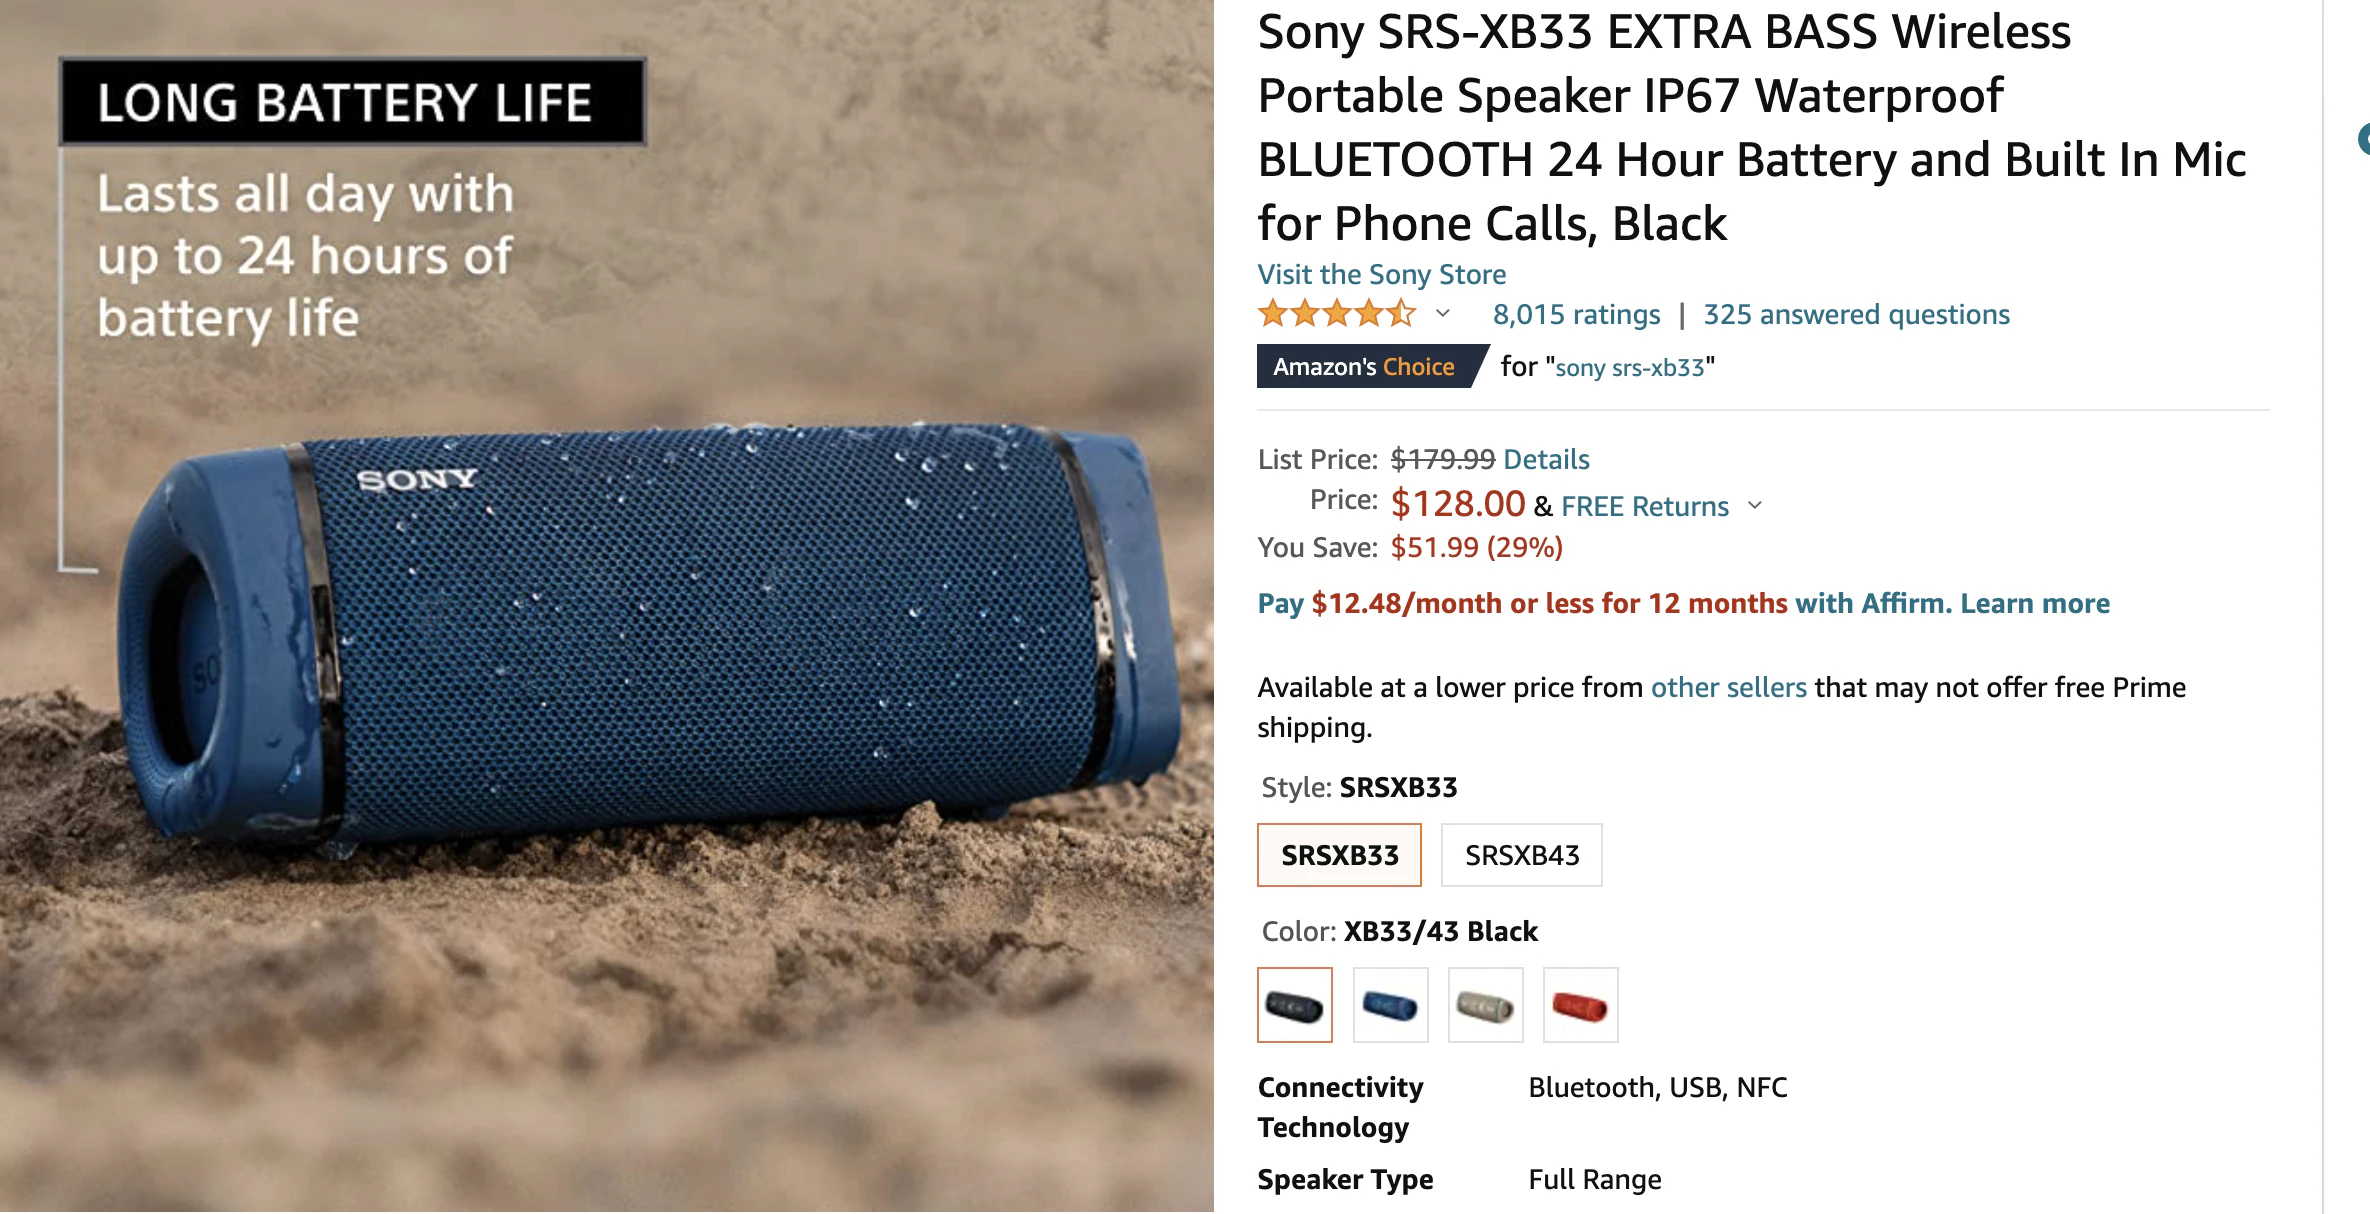
4. Product Images
Product images are at least as important as every word you write in your description when it comes to getting the customer to buy.
Be sure that your main product image is on a plain white background, doesn’t include any kind of props, graphics, or text and that your product takes up at least 85% of the frame.
Your additional images should show your product in different use states to give your customer’s a better understanding of how your product looks and works.
BENEFITS-FOCUSED IMAGES

1. Upload only high-resolution photos.
When adding product images you need to make sure that they are within Amazon’s guidelines.
Amazon requires that uploaded product images are at least 1,600 pixels on the image’s longest side and that they be a minimum of 500 pixels on the shorter side.
This is so the images don’t become too blurry when customers use the zoom feature.
2. Include photos that show multiple features of your product.
Your main image is required to be on a white background without props, but your additional images are not.
You want to include lifestyle product photos that show how your product would look in its intended environment.
In your product images, you also want to showcase all of its different features. This includes shots of your product from different angles and possibly close-ups that show improved design or functionality.
3. Edit your product photos to make your product stand out.
Don’t be afraid to use text and graphics on your additional product photos.
Your customers may look at your photos before they consider reading your product description, so your images must be clear.
Certain product features aren’t obvious in photos. You can use text and other graphics to make your customers understand your product more fully.
Summary
Your Amazon product listing is more than a few keywords and images tossed on a webpage.
It’s your chance to tell Amazon exactly what your product is and who it is for.
Alternatively, it’s also your chance to connect your customers with your product.
Don’t waste your opportunity by haphazardly setting up your listing.
Save this guide to refer back to the next time you add a product to Amazon.
Trust your Amazon business to a 7-figure Amazon Marketing Agency that will help your brand growth in the next 90 days.